You are already aware that I use Linux for everything, from development to my regular tasks.If you don’t have any idea what Linux is, check out my last blog.
So today I will teach you how to install Linux and how to dual boot with another operating system.
Dual Boot:
If you don’t know what dual boot is, it is a process in which your computer has more than one operating system. Just like me, I can use Windows when I want to game and Linux when I want to work. You can only run one operating system at a time, so only one operating system can use your storage, screen, and processing power.
Requirements:
In order to install Linux, you need a couple of things, which are listed below:
- A flash drive of at least 8GB
- A second computer or any device with an internet connection for troubleshooting.
- An Internet connection is required.
So that is the hardware now for the software.
- A Linux operating system ISO file.
- A programme called Rufus
- Space on your computer; for space, 25GB is enough, but if you want to work and store some files, then it’s not enough. I would recommend at least 100GB if you want to store files and do some work.
Downloading:
Now it’s time to download and burn the ISO file to the USB. The very first thing is ISOs, and in the world of Linux, there are a lot of options.
Linux Distribution:
In Linux, there is a concept known as distribution, also known as a distro. Linux by nature is a kernel, where all of the drivers and their dependencies live and your hardware talks to your operating system.
So there are three major districts.
- Debian Linux
- Arch Linux
- Fedora Linux
These three are the granddaddies of all Linux distributions. The core (kernel) might be the same, but the way they package applications and package managers is totally different, and these are the package managers for each distro.
- Debian uses apt-get.
- Arch uses pacman
- Fedora uses dnf
Every distro is based on one of these distros.For example, Ubuntu is based on Debian, Manajaro on Arch Linux, and CentOS on Fedora. As a result of this model, there are thousands of Linux distributions, each with its own unique way of installing the operating system and installing applications.
Installing Method:
There are two ways to install Linux or any Linux distro: using the command line, aka entering everything using the terminal, or using the GUI (Graphical User Interface). Most Linux distributions have a GUI installer, but they also have a command-line installer.
More specifically, Arch Linux does not have any GUI interface; in order to install it, you have to use the command line, but different arch-based Linux distros have GUI installs, so you can install any of the arch-based Linux distros.
Disk Partition:
The disc partitioning is very easy on Linux; it only required 3 partitions.
- Root Folder
- Memory Swamp
- Linux Boot Drive
This is the important thing: the file system is very different from Windows, MacOS, and Linux, which have very similar file systems. The file system is the method by which an operating system will save different files on the disk.
Downloading ISO:
Now you need to download an ISO and for this Process I am downloading Ubuntu and I will be installing on a virtual machine but the process will remain the same if you are install on bare metal. You can download Ubuntu ISO by clicking here
Installing Process:
Now your have downloaded an ISO you need to Burn the ISO to a USB and to that follow these steps.
Creating Boot USB:
-
Open the version of Rufus you downloaded. The program will start right away.

-
Insert the flash drive or other USB device into your computer that you want to “burn” the ISO file to, assuming it’s not already plugged in.
-
From the Device drop-down at the top of the program, choose the USB storage device you want to burn the ISO file to.
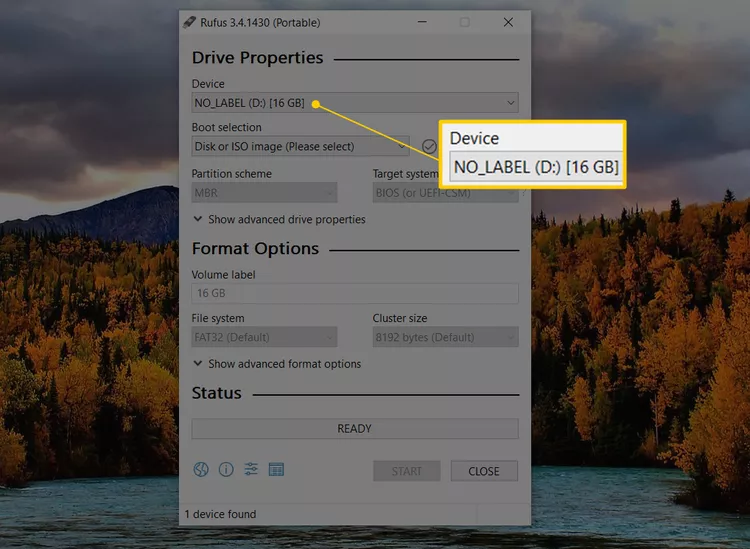
Rufus tells you the size of the USB device, as well as the drive letter and current free space on the drive. Use this information to double-check that you’re choosing the correct device, assuming you have more than one plugged in. Don’t worry about the free space that’s indicated, since you’ll be erasing the entire drive as part of this process.
-
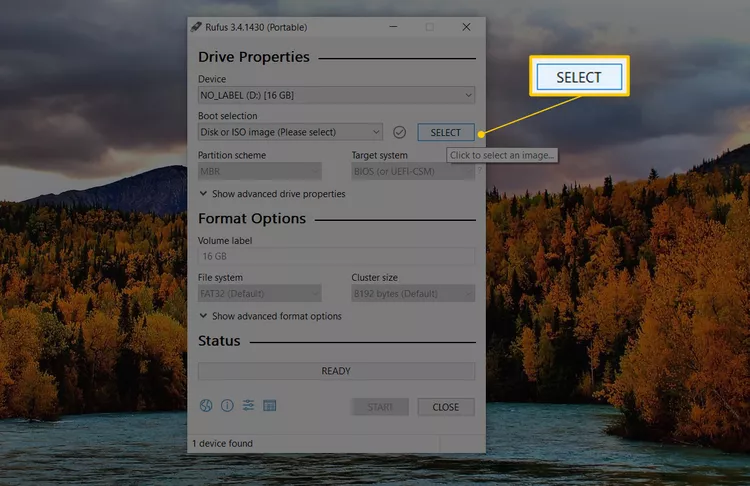
From the Boot selection drop-down, make sure Disk or ISO image (Please select) is chosen.
-
Choose SELECT
-
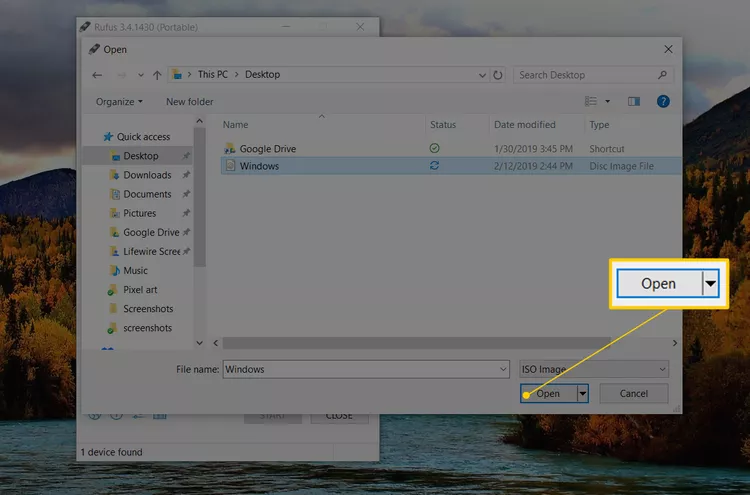
Locate and select the ISO image you want to burn to the flash drive, and then press Open to load it into Rufus. image4
-
Wait while the software inspects the ISO file you chose. This might take several seconds or may go by so quickly that you don’t even notice.
-
Under the Image option area, pick Standard Windows installation if you see this and if that’s the case. For example, if you’re putting a Windows installation ISO image onto the flash drive, and you get this option, you’d want to enable it for sure.
-
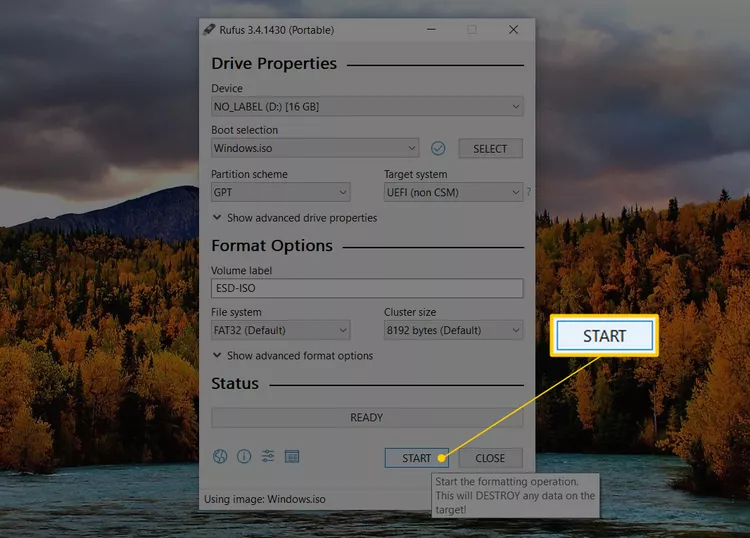
Leave the Partition scheme, Target system, File system, and Cluster size options alone unless you know what you’re doing or you’ve been advised to set any of those parameters to something else. For example, maybe a bootable tool you downloaded in ISO format advised on its website to make sure the file system is FAT32 instead of NTFS if you’re burning to USB. In that case, make that change before continuing.
-
You’re welcome to enter a custom volume label in the Volume label field, but leaving it at whatever the default happens to be, or even blank, shouldn’t have any impact on anything.
-
Inside the Show advanced format options menu, you’ll see a number of…yes, format options! You can leave all of them in their default state, but you’re welcome to select Check device for bad blocks if you have some concern that the flash drive or USB device you’re using may have an issue.
-
Select START to start the “burning” of the ISO file to the USB device you chose.
-
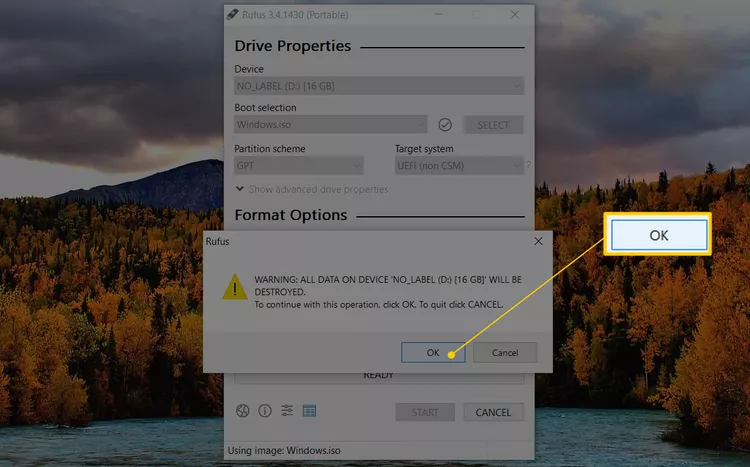
Read any warning messages and address them appropriately. For example, select OK to the WARNING: ALL DATA ON DEVICE ‘XYZ’ WILL BE DESTROYED message that appears next.
 You might also see a Download required message if Rufus needs some additional files to complete the burn process. Selecting Yes will start that download.
 -
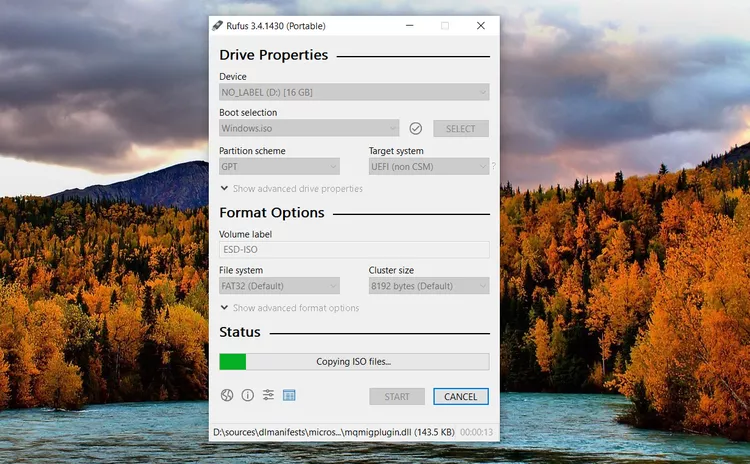
Wait while Rufus properly formats the USB drive so it’s bootable, and then copies all the files to the drive that are contained in the ISO image you selected earlier. The total time to do this depends very much on how large the ISO file is that you’re working with. Some small diagnostic tools take under one minute, while larger images (like a 5 GB Windows 11 ISO) could take closer to 20 minutes. Your computer and USB hardware speeds are a big factor here as well.
-
Once the status at the bottom of the Rufus program window says READY, you can close Rufus and remove the USB drive.
Booting from USB:
Now it’s time to boot from that USB. Every computer is different, and depending on the model of your laptop, your computer may boot differently, but most PCs boot from USB by clicking F12, F10, and F9. Remember, before booting from USB, you must enable boot from USB in your BIOS. This setting is primarily found in the security section of your BIOS.
Once you keep pressing f12 for boot, a menu should pop up where you can select your USB, and then you will enter Linux.
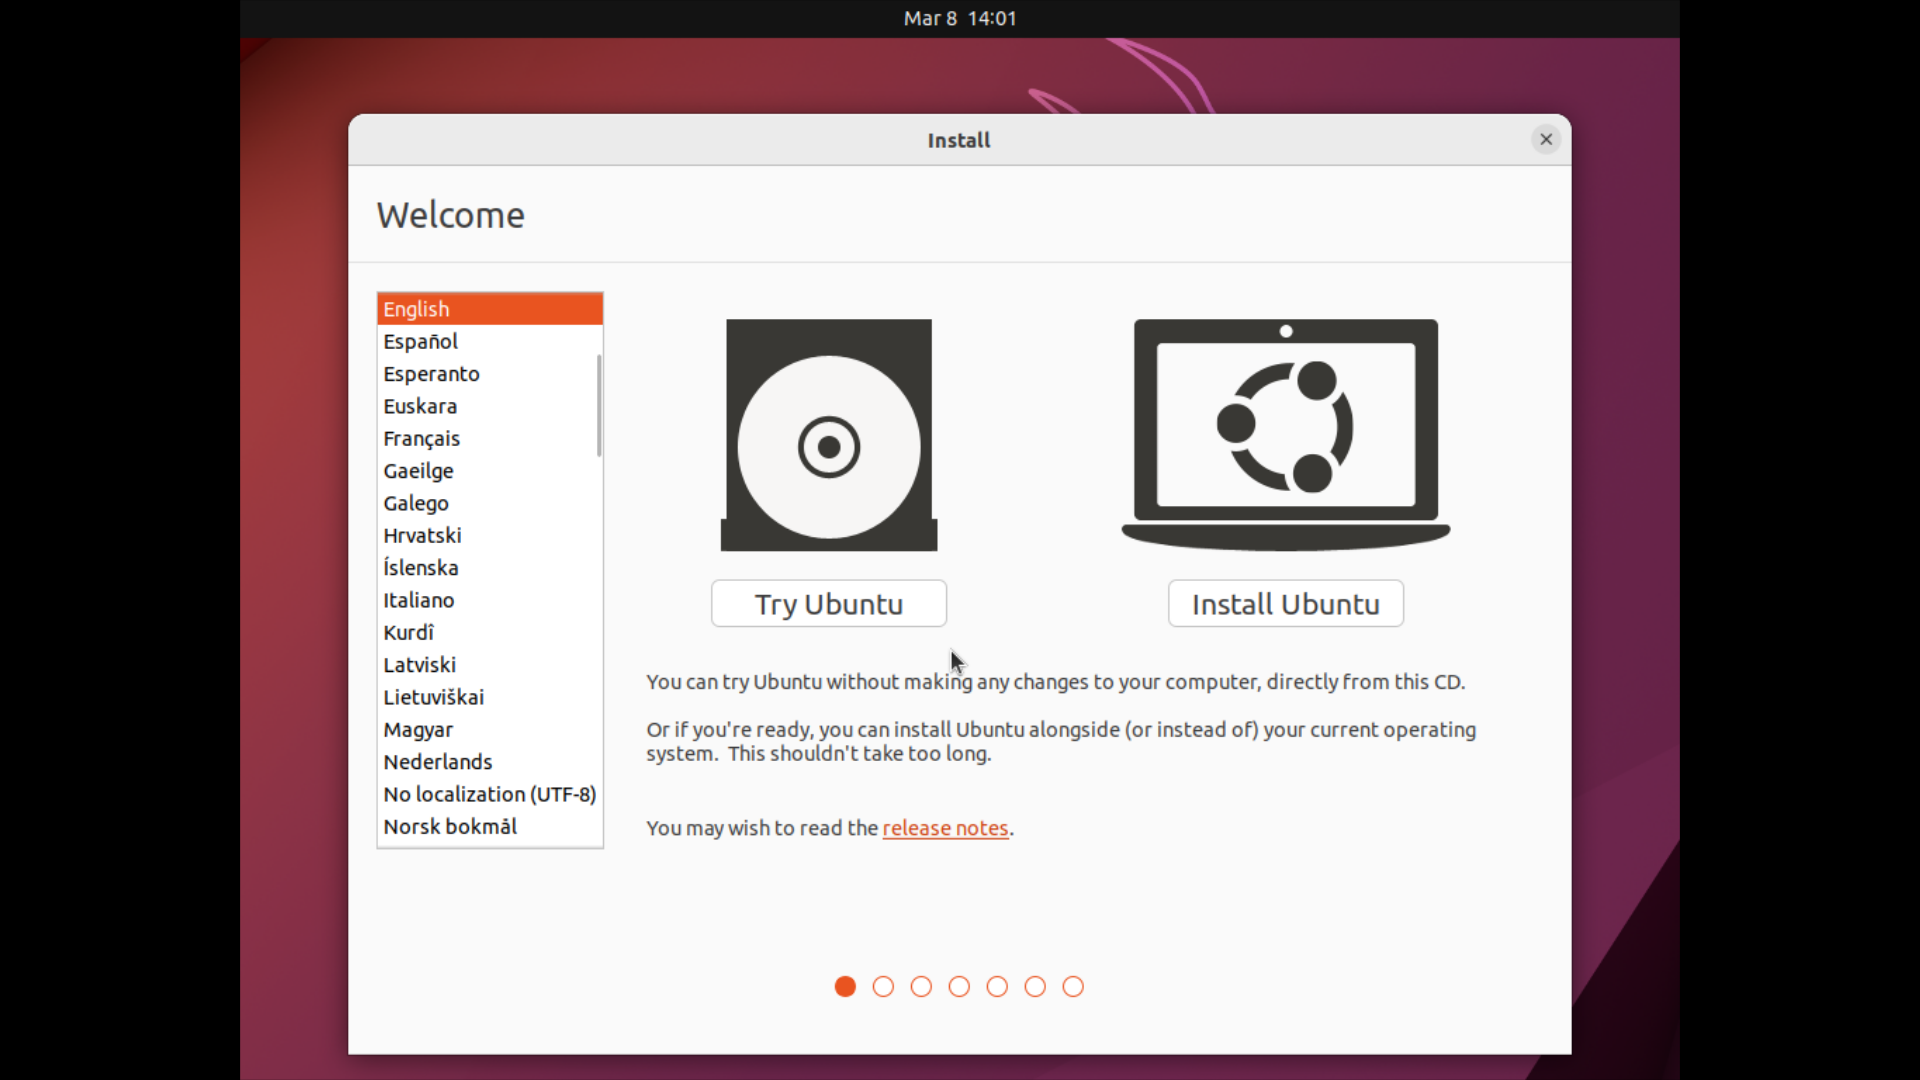
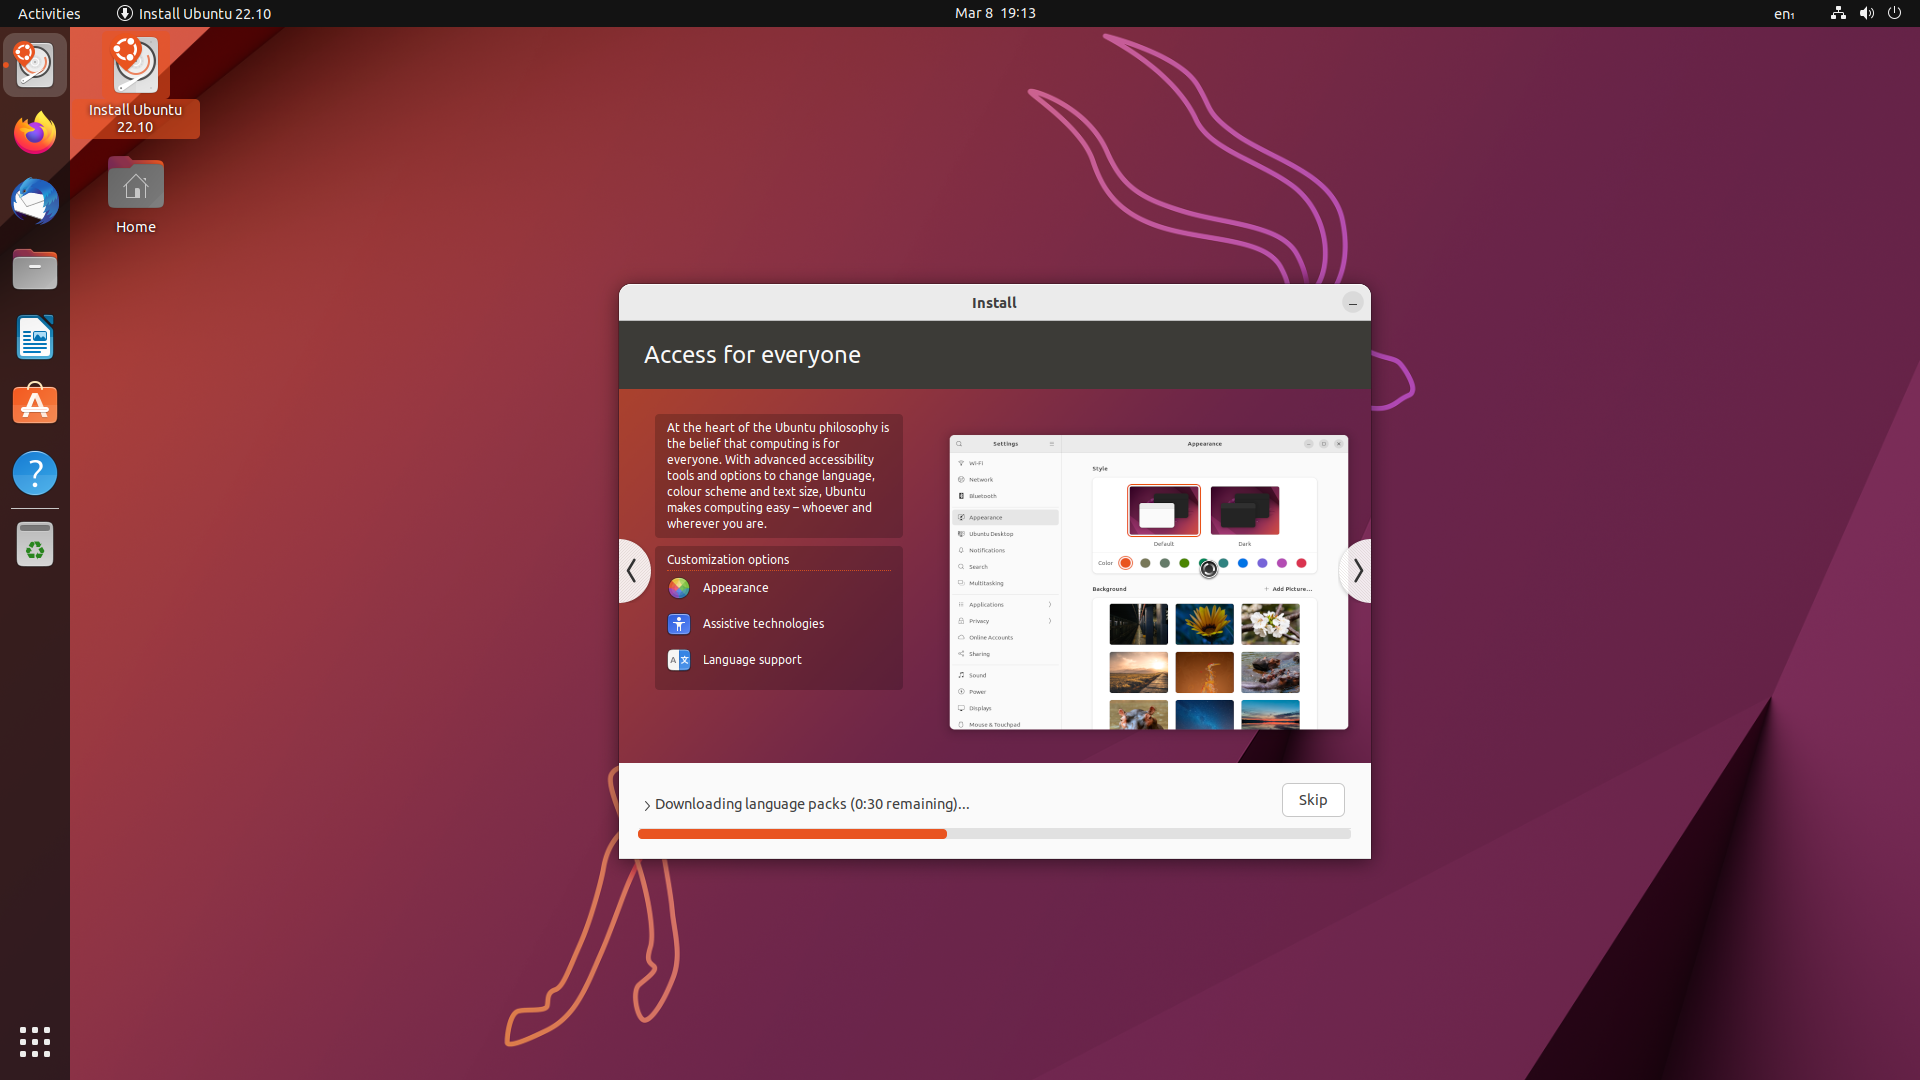
When you first boot into Linux, you will be greeted by a bootloader called Grub. Select Try and Install Ubuntu or Linux.

Installing Linux:
-
Now click on Try and install Ubuntu. Once clicked, you will boot into the live environment, and you will be given two options. Try an OS or install an OS. Try OS will not affect your installed operating system.
-
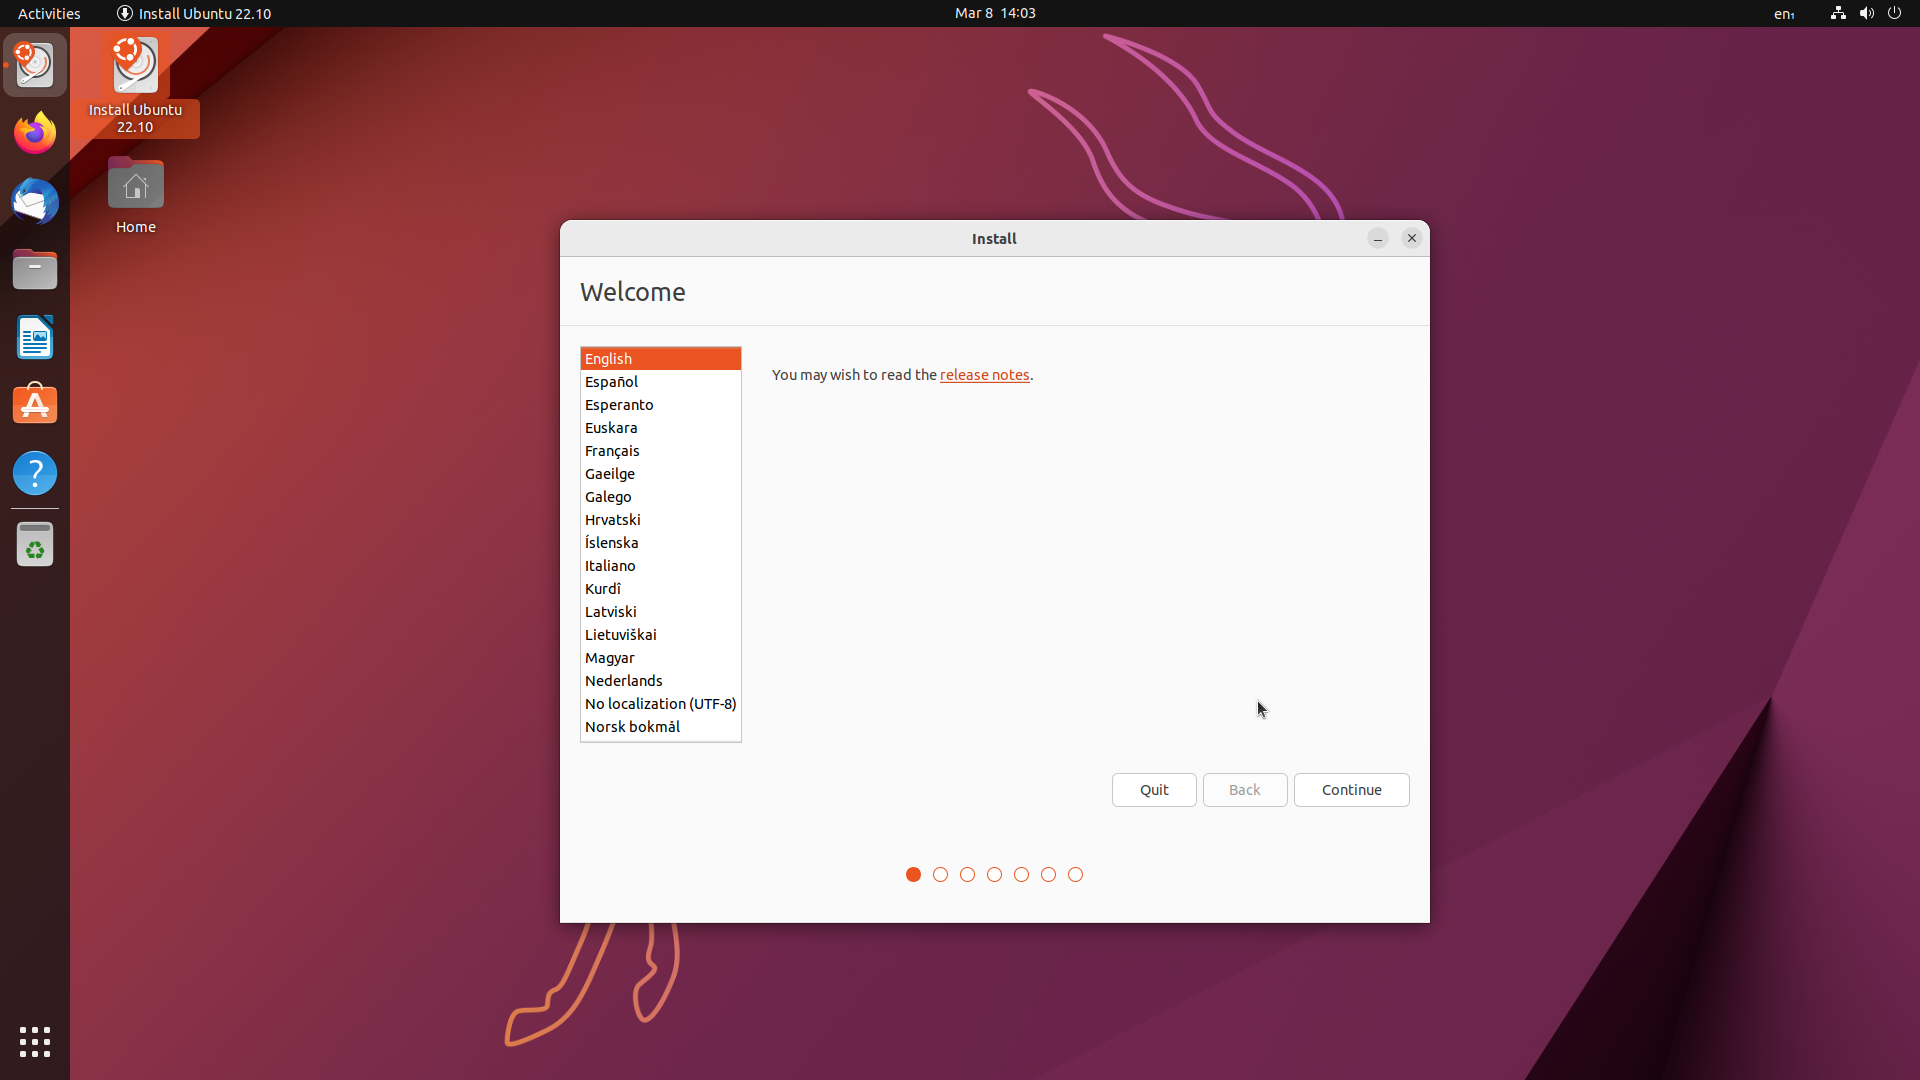
Now I will be going with Install OS. but free will to try the OS in a live environment.
-
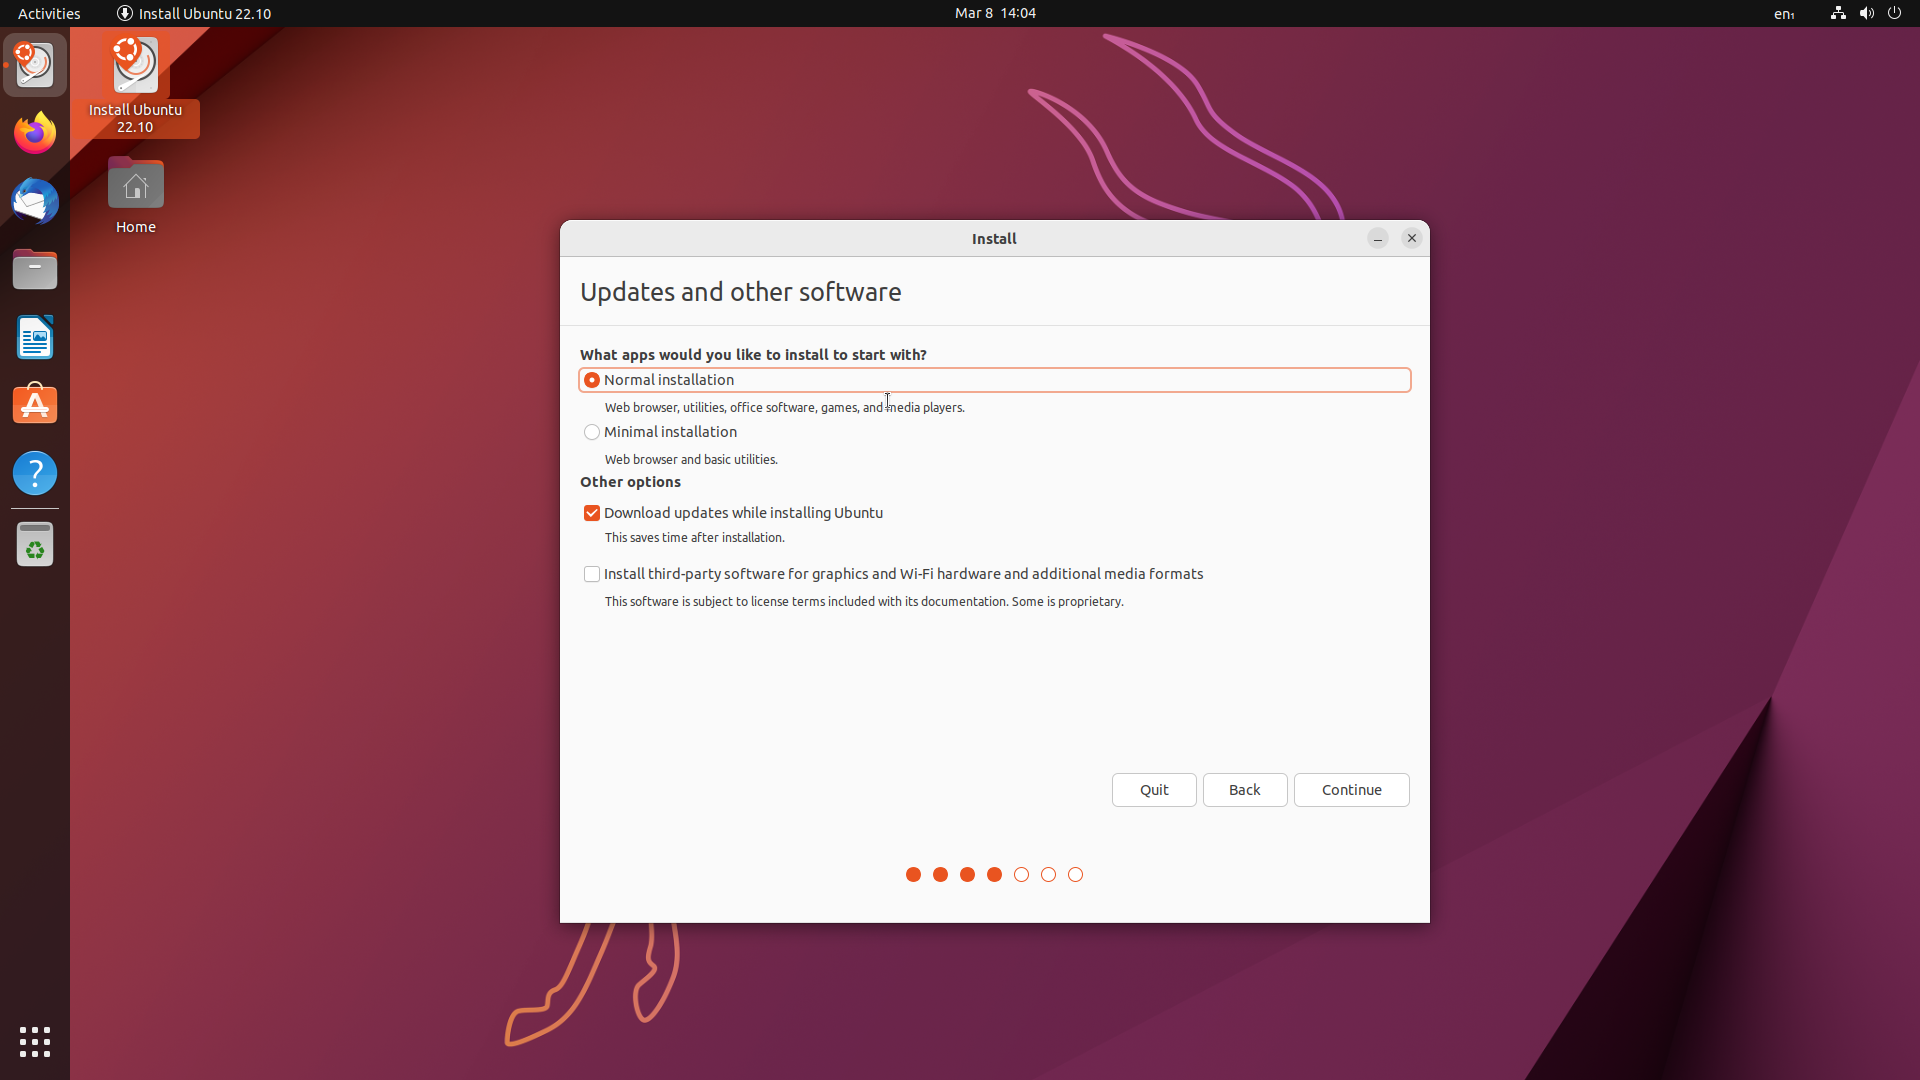
Click “Continue,” and then you will be moved to the next part of the installment. On this page, you will have two choices: install with fewer applications or install with all the applications that come with Ubunut; it’s your call. I’ll be going with the full install, and if you have some non-open source driver, then click “Enable & Install Third Party Software.”
-
The next part is disc Disk Management.This screen allows you to configure your installation. If you would like Ubuntu to be the only operating system on your device, select Erase disc and install Ubuntu.
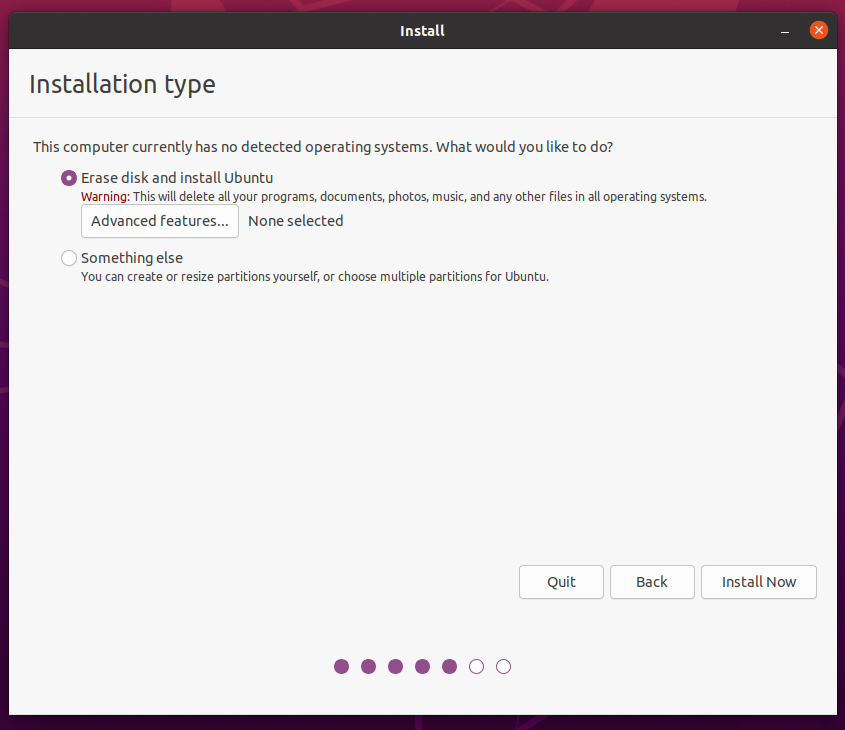 Click “Continue” to install your system.
-
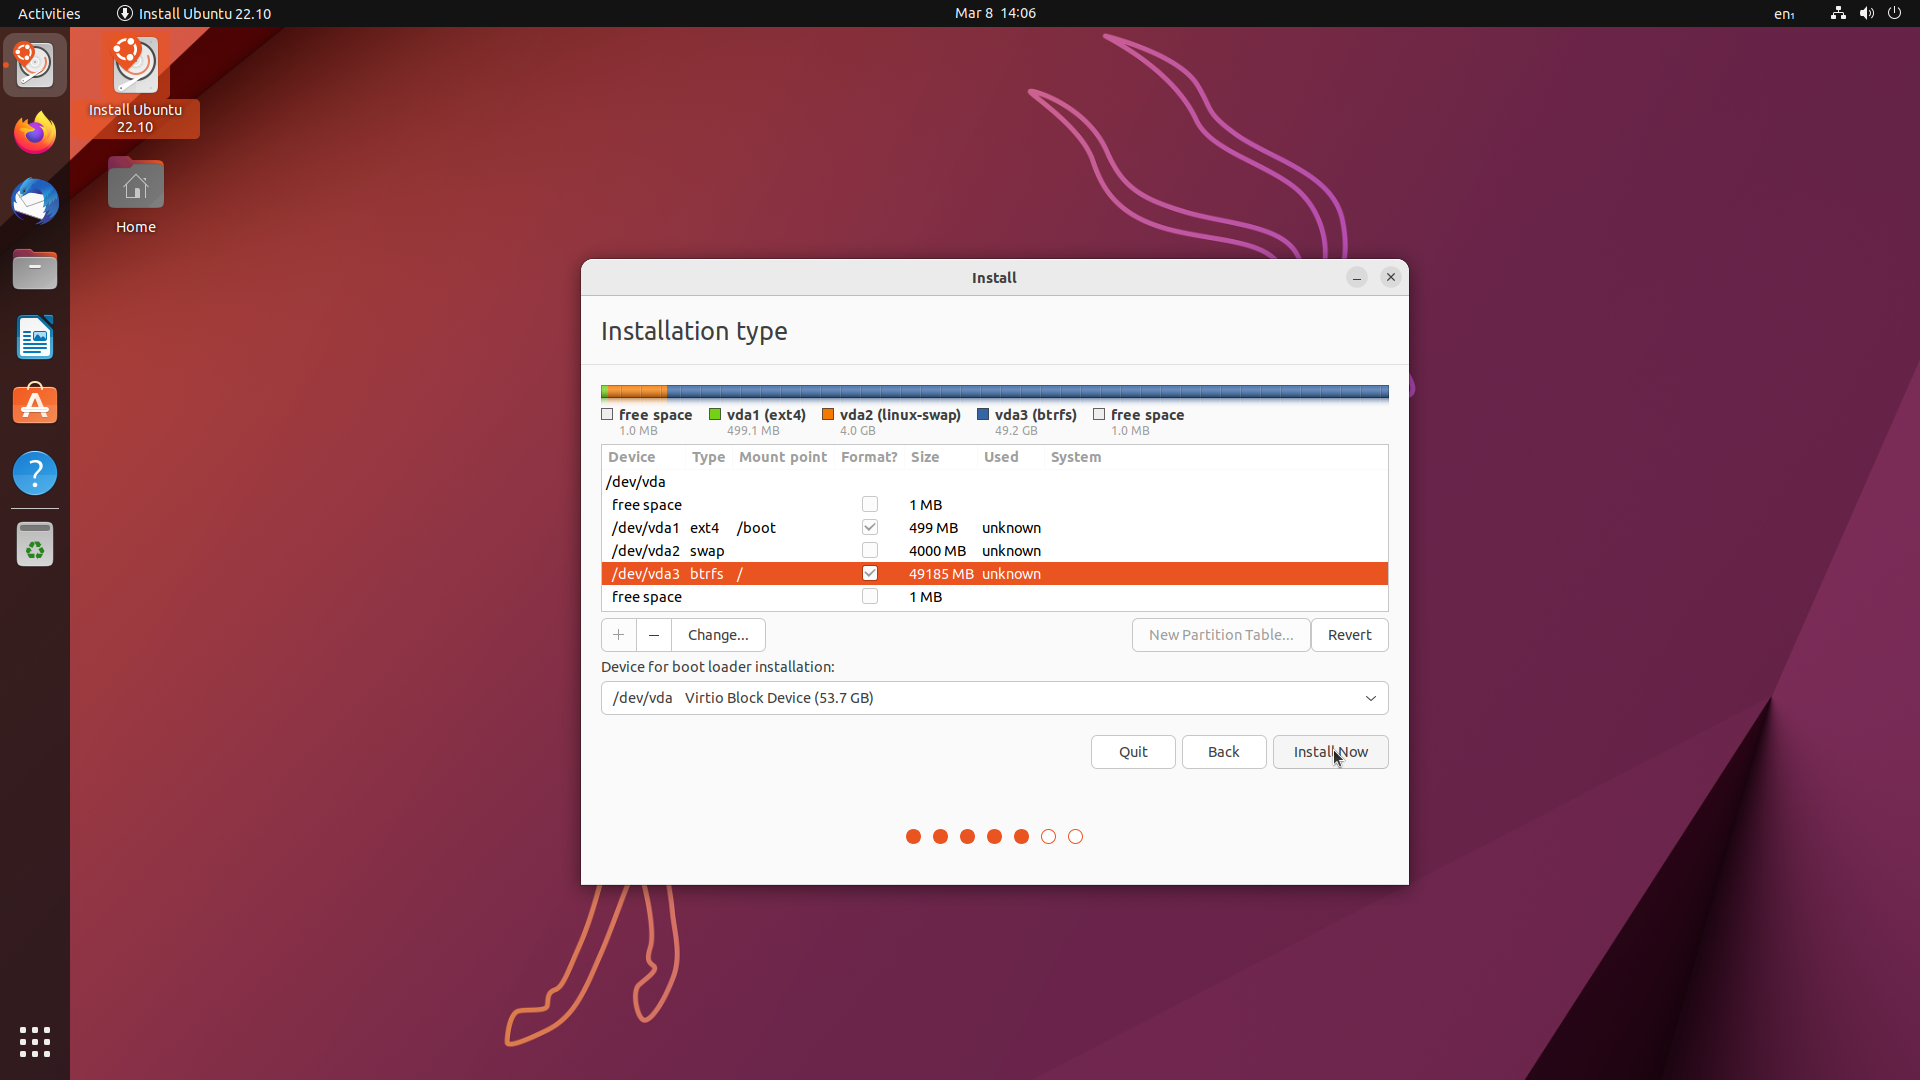
For dual boot If you are going for dual boot, then do not choose this option. Then select “Something else**. Now there will be some partition. You have to create three parts, something like this: For all, there will be three sections.
- Boot as a filesystem of FAT32 or ext4 (/boot) or (/efi/boot) Swamp Linux as Linux swamp
- Root Drive as ext4 or btrf as (/)
-
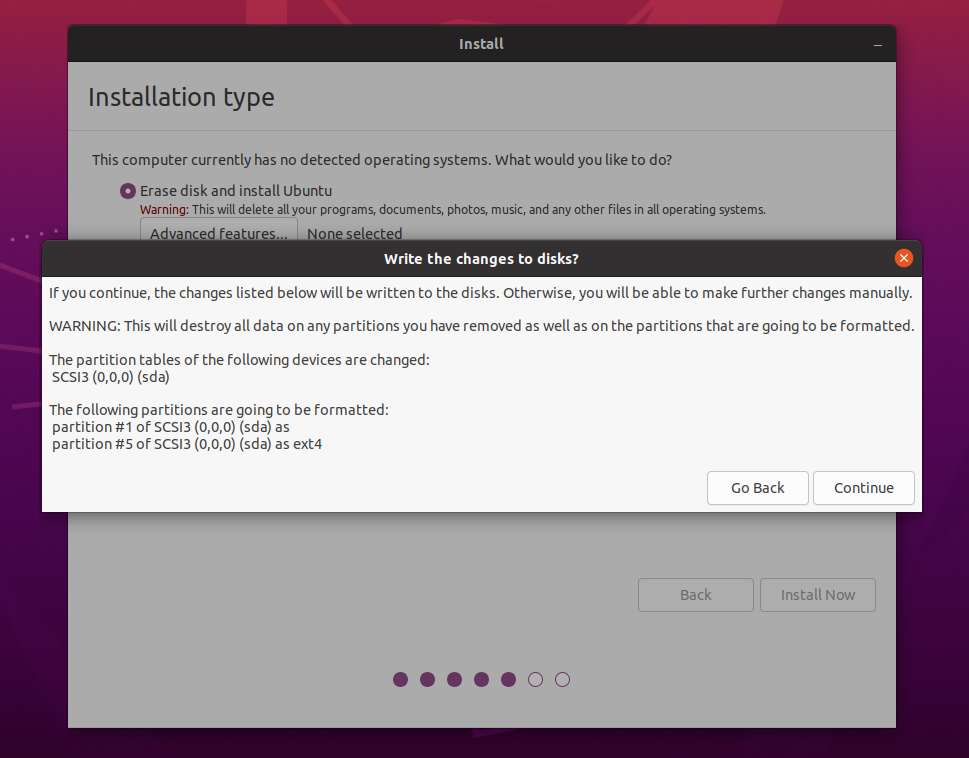
Then click “Install”:
-
Reboot your system once the installation is complete.
-
Once you reboot, you will see a new menu item called “Grub Boot Loader.” If you are running Windows as well, by default it will boot into Linux, and you will see a second or third option to run Windows.
Chosing Right Distro:
Due to the nature of open source projects and the Linux kernel, there are a lot of distributions, and choosing one can be difficult, so here are some good recommendations for new users.
All the mentioned distributions are based on Debian, and Linux Mint is based on Ubuntu. The installation process is the same across the board.
If you want to use Arch, then I will recommend it.
Install any one of the distros and try them, and if your thing is too dangerous, try installing Linux in a virtual machine. One of the best ways to spin up an OS is to do some testing and then delete it without touching your existing OS.
The above-mentioned Distros differ greatly in appearance and functionality, but the installation method is the same.No matter what distro you are using, installing, or both,
Conclusion:
So, this is how to install linux and it is easy, Noe you know how to install linux and with this info, go create your own operating system that fit your work flow. If you want some insporection then checkout redit for some cook looks and functionality. With that, we will see you next time ❤️❤️.
Credit:
This article was written by Abdul Rafay and published on Future Insight.
Contact Us:
If you encounter any issues or have any questions regarding any of the articles on this website, please do not hesitate to contact the website’s support team. Your feedback is important and the team is dedicated to providing prompt and effective assistance to ensure a positive user experience.
To access the contact page, simply click on the “Contact” tab in the navigation menu or visit the following URL: contact page. From there, you can fill out a contact form or find additional information on how to get in touch with the support team.
Don’t let any questions or concerns go unanswered - reach out to the support team for help and guidance. They are committed to providing excellent customer service and will do everything possible to ensure that you have a seamless experience on the website.