The world is changing rapidly. With the rise of AI and advancements in computing power, establishing a secure internet connection has become increasingly challenging. The vastness of the internet allows for access to a wide range of information, but it also poses risks. If one is not cautious, personal information can be sold online. Various organizations track your online activities, creating profiles that are used to deliver targeted advertisements. Additionally, the threat of viruses looms, capable of compromising your system and resulting in the loss of valuable data.
Therefore, the question arises: How can you safeguard your operating system from viruses, data theft, and other potential dangers? Fear not, for I will provide an explanation on everything you need to secure your computer or laptop, ensuring the protection of your digital world.
There are a lot of ways you can secure your computer. In this blog, we will go through how to secure Windows 10 or Windows 11.
Windows
Windows 11 was released a while ago with its main selling point being enhanced security. However, I’m not entirely convinced about its level of security. While Windows is great for various tasks, it does have certain limitations when it comes to protecting your private data and defending against different types of attacks. Even after years of development, Windows 10 still exhibits some security issues. Moreover, Windows has a tendency to collect a significant amount of user data during installation.
Windows Security
When it comes to securing Windows, follow these steps in the specified order:
- Install Latest Security Patches.
- Enable Firewall.
- Enable Windows security features.
- Add Password/Biometric authentication.
- Encrypt Disk.
- Backup your system.
- Debloat Windows.
By following these steps, you can ensure better security and privacy for your Windows computer.
Security Patches
A security patch in the context of Windows refers to an update or fix provided by Microsoft to address known vulnerabilities or security issues in the operating system. These patches play a critical role in maintaining the security and integrity of your Windows system.
Security patches are released by Microsoft on a regular basis, typically in the form of Windows Updates. These updates are designed to close security loopholes, fix software bugs, and improve overall system stability. By applying these patches, you ensure that your operating system has the latest security enhancements and protection against potential threats.
The importance of installing security patches cannot be overstated. Neglecting to update your system leaves it vulnerable to attacks that exploit known vulnerabilities. Hackers and cybercriminals often target unpatched systems, taking advantage of these security gaps to gain unauthorized access, compromise data, or disrupt operations.
Microsoft continuously monitors and analyzes potential security risks to identify vulnerabilities in their software. Once a vulnerability is identified, the company develops a corresponding security patch to address the issue. These patches are thoroughly tested to ensure compatibility and stability before they are made available to users.
To keep your Windows system secure, it is crucial to stay up to date with the latest security patches. You can configure your system to automatically download and install Windows Updates or manually check for updates on a regular basis. By doing so, you protect your computer from known security vulnerabilities and benefit from the ongoing efforts of Microsoft to maintain the security of their operating system.
Remember that security patches alone are not enough to guarantee absolute security. It is equally important to implement other security measures, such as using robust passwords, employing antivirus software, practicing safe browsing habits, and regularly backing up your data. Together, these practices form a comprehensive approach to safeguarding your Windows system and protecting your digital assets.
Enabling Firewall
A firewall is a simple yet powerful tool that helps protect your computer and all its valuable information. It acts as a digital shield, standing guard between your device and the vast sea of online threats. This robust guardian keeps a watchful eye on the traffic flowing in and out, ensuring that only authorized and safe data gets through while malicious intruders are kept at bay. By analyzing and filtering data packets based on specific rules, the firewall acts as a gatekeeper, safeguarding your precious files and personal data from hackers, viruses, and other cyber-attacks. It’s like having a vigilant security guard for your digital fortress, giving you peace of mind and a solid defense against online dangers.
A firewall is like the bouncer of network security, keeping the bad guys out and letting the good stuff in. It’s a vital shield between a company’s internal network and all the sketchy stuff out there. This cyber-guardian watches the traffic coming and going, using some cool rules to decide who gets in and who gets kicked to the curb. By examining data packets and checking their source, destination, and content, firewalls can stop hackers, malware, and all sorts of troublemakers from messing with your network. They’re like the ultimate bodyguards, filtering out the bad while allowing the legit stuff to flow freely. Firewalls can be either hardware or software, but either way, they’re your trusty defenders, making sure your precious data stays safe and sound.
Enable Firewall on Window 10
To enable the firewall on Windows 10, you can follow these steps:
-
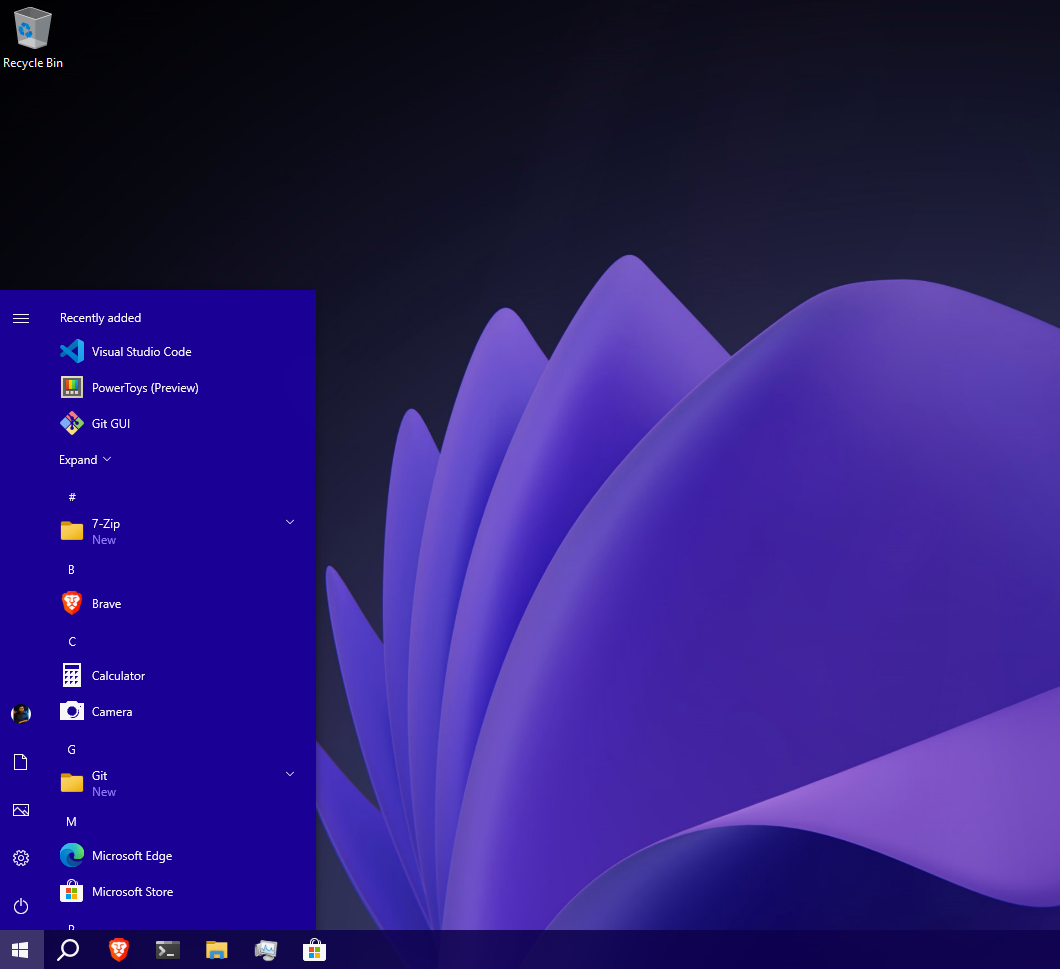
Click on the “Start” button on your desktop and select the “Settings” gear icon.
-
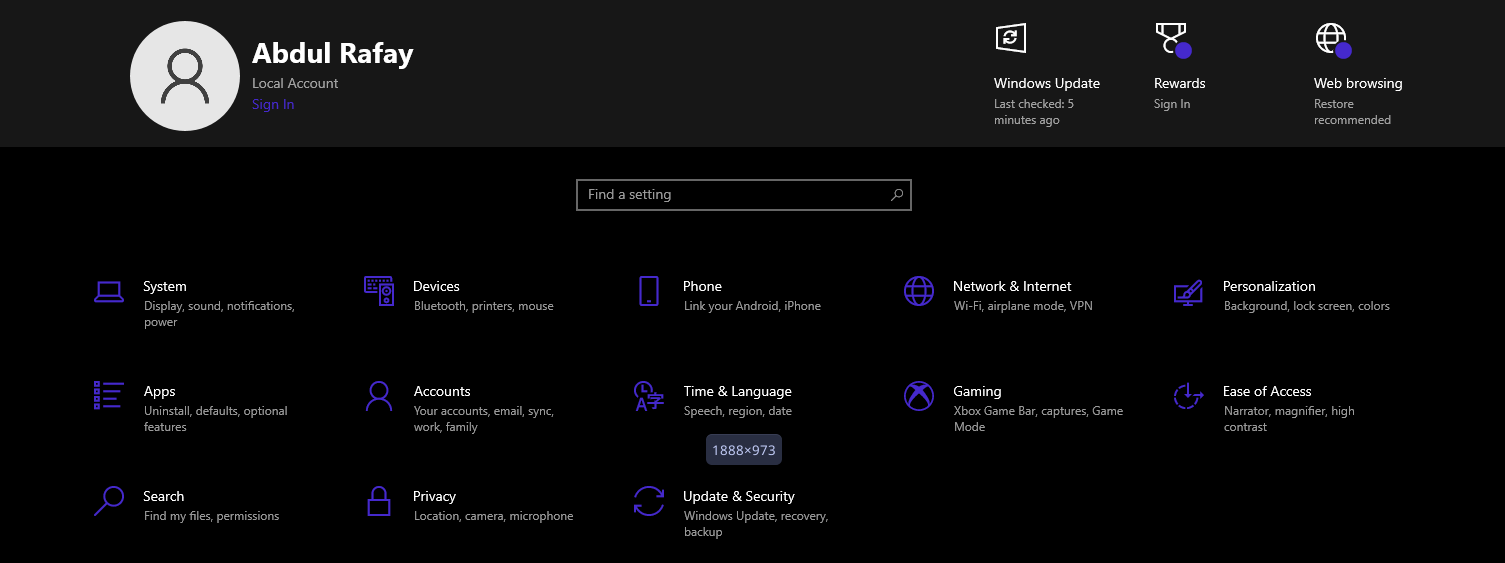
In the Settings window, click on “Update & Security.”

-
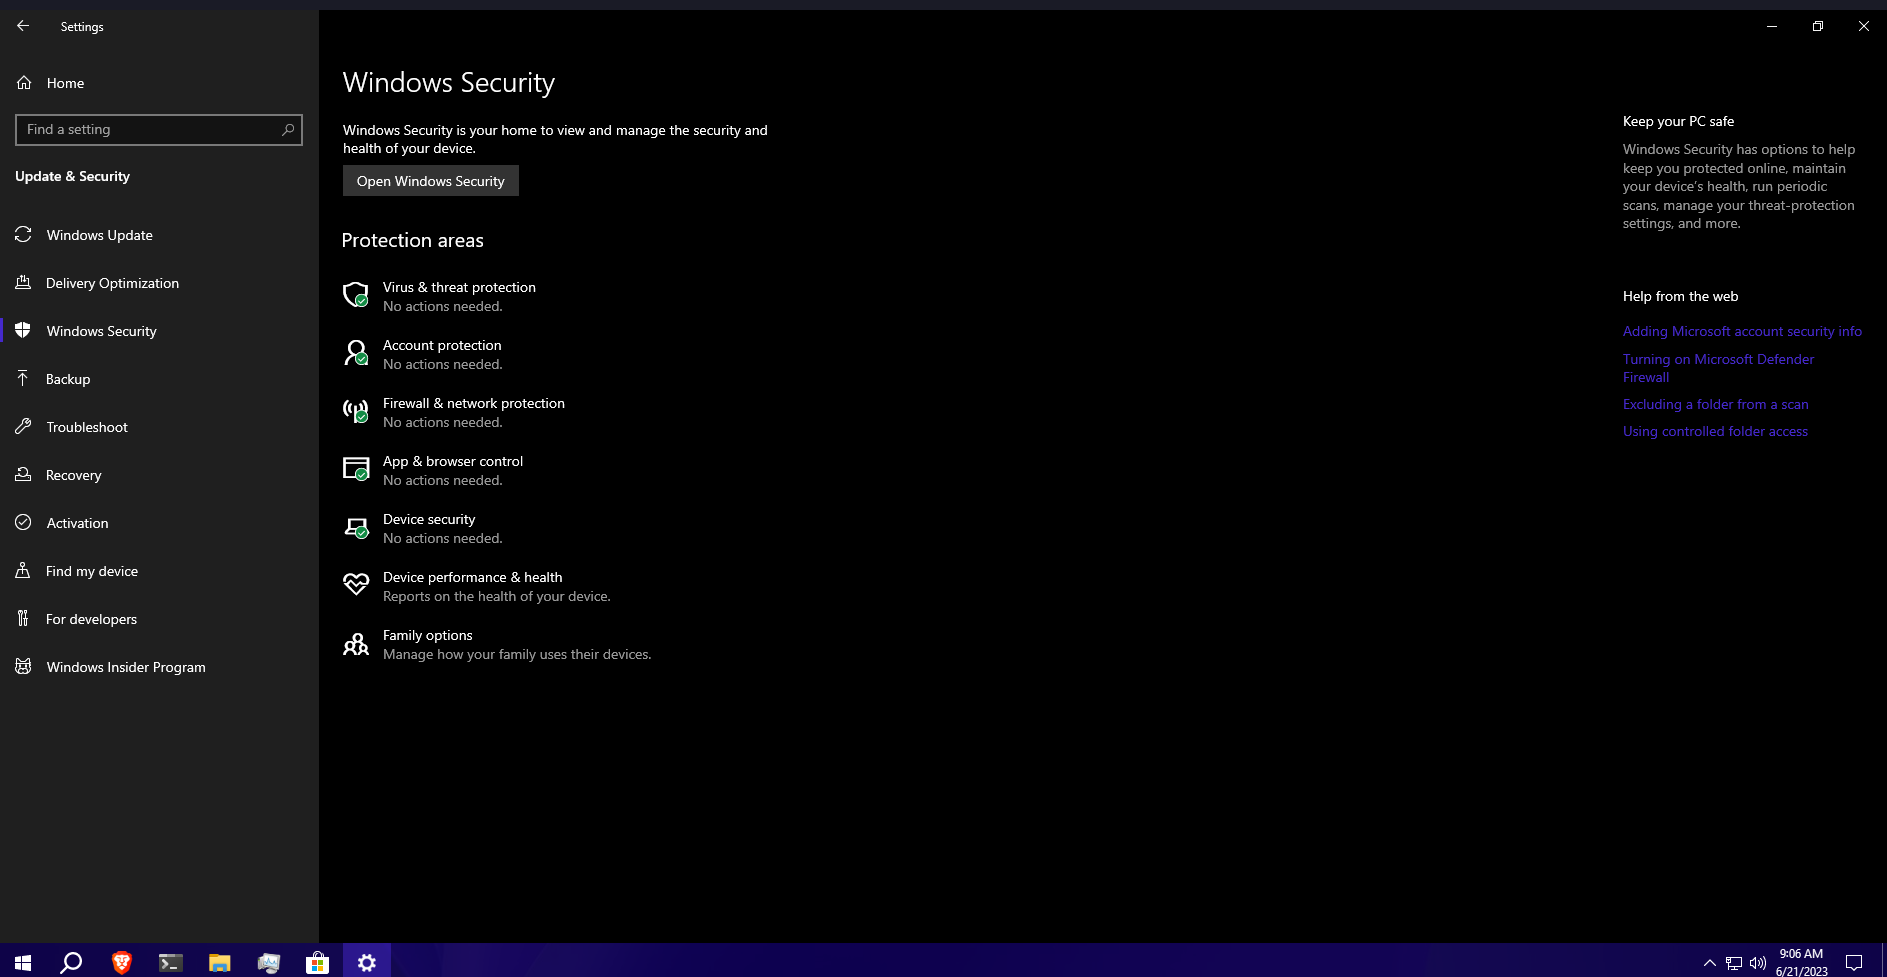
From the left-hand menu, choose “Windows Security.”

-
Within Windows Security, select “Firewall & network protection.”

-
Under the “Firewall & network protection” section, you will see your active network connections. Click on the network you want to enable the firewall for (e.g., “Private network”).
-
On the next screen, you will find the Windows Defender Firewall settings for that specific network. Ensure that the “Windows Defender Firewall” toggle switch is turned on.
-
You can also customize the firewall settings by clicking on “Allow an app through firewall” or “Advanced settings” on the same page.
By following these steps, you will successfully enable the firewall on your Windows 10 computer, providing an added layer of protection against unauthorized access and potential security threats.
Firewall on Window 11
The firewall is typically enabled by default. It provides a basic level of protection for your computer by monitoring incoming and outgoing network traffic and blocking potentially malicious connections.
To ensure that the firewall is active on your Windows 11 system, you can follow these general steps once Windows 11 becomes available:
-
Click on the Start button or press the Windows key to open the Start menu.
-
Search for “Windows Security” or “Defender Security Center” and open the corresponding app.
-
In the Windows Security or Defender Security Center window, you should see an indication that the firewall is active and protecting your system.
-
If the firewall is not enabled, you can typically activate it by going to the “Firewall & network protection” or similar section within the app and following the prompts to turn on the firewall.
Enable Window Defender/ security
Detecting viruses is crucial for any operating system as they can rapidly wreak havoc on your computer, potentially leading to its destruction within minutes. Moreover, these stealthy culprits have the ability to silently pilfer all your sensitive information, leaving you unaware of their malicious activities.
Window Defender on Window 10
To fortify your defense, enabling Windows Defender on Windows 10 is a key step. Here’s how to do it:
-
Begin by clicking on the “Start” button on your desktop and selecting the gear icon for “Settings.”

-
Within the Settings window, click on “Update & Security.”
-
From the left-hand menu, choose “Windows Security.”
-
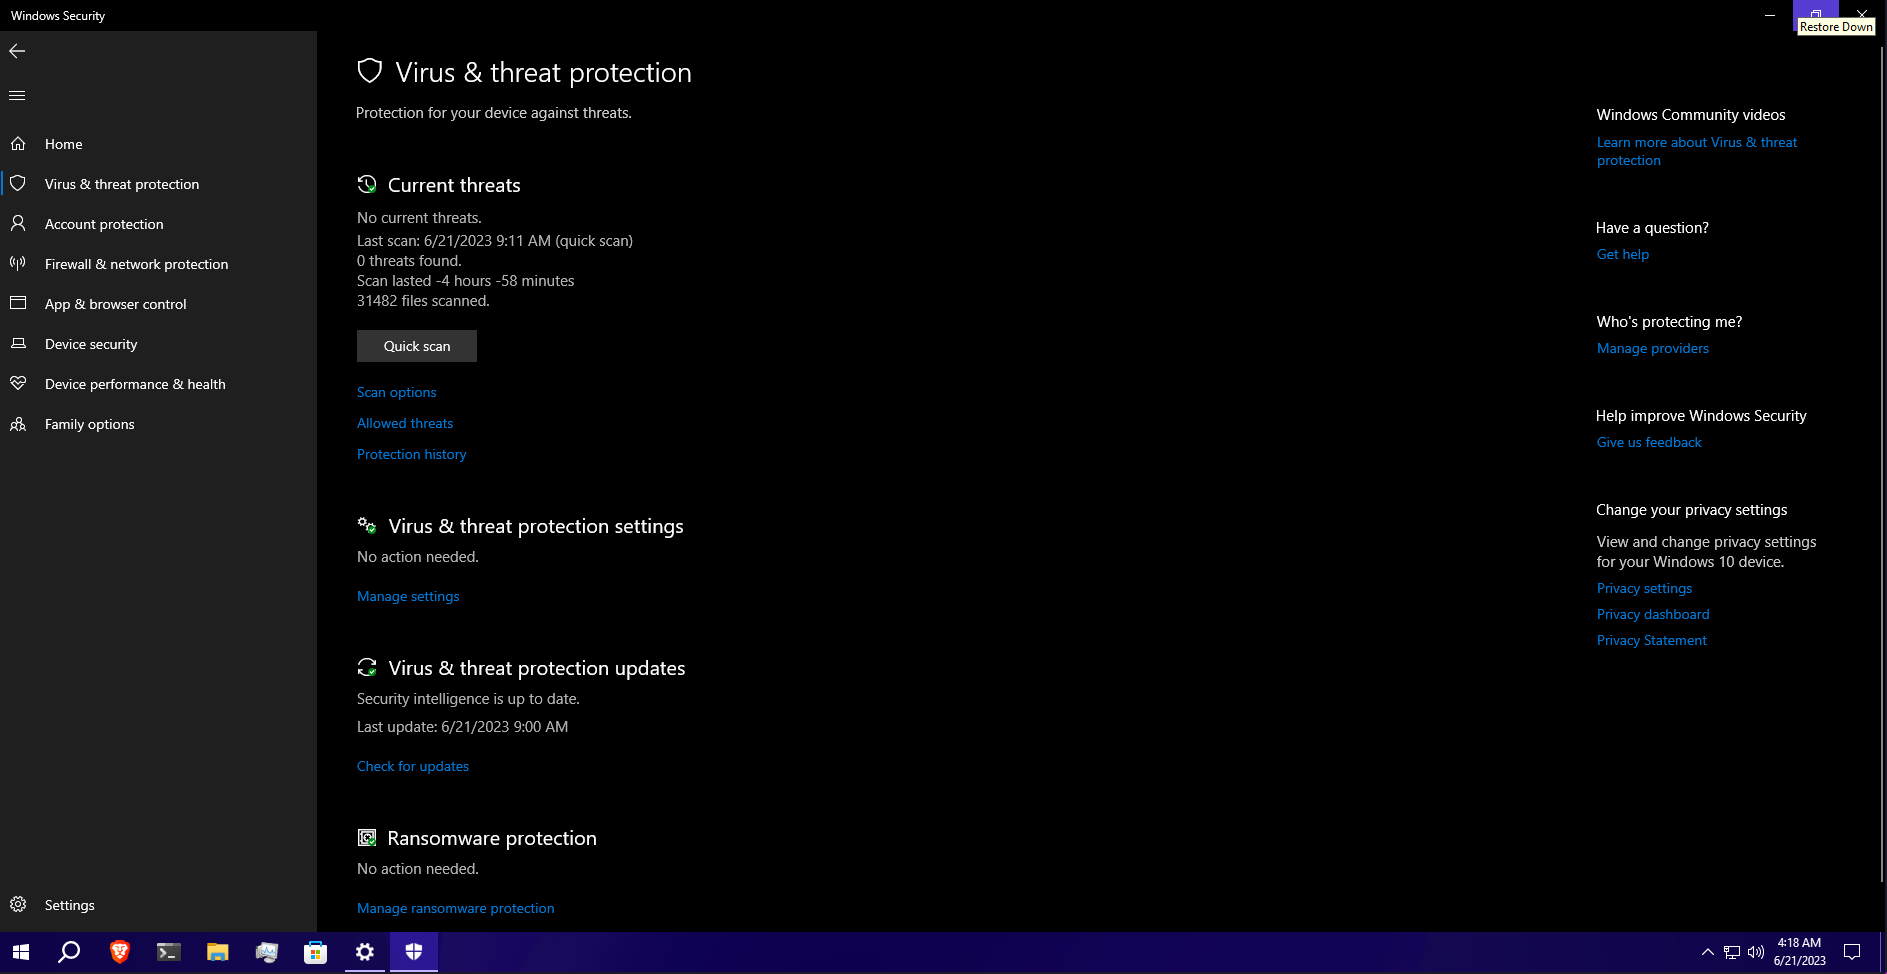
In the Windows Security section, click on “Virus & threat protection.”
-
Under Virus & threat protection, you will find the Windows Defender settings. Ensure that the “Real-time protection” toggle switch is turned on.
-
Additionally, you can click on “Scan options” to perform various types of scans, such as a Quick Scan or a Full Scan, to proactively detect and eliminate any existing malware on your system.
-
Windows Defender also provides additional security features such as “Cloud-delivered protection” and “Automatic sample submission” to enhance your defense against emerging threats. You can enable these features by navigating to the corresponding sections in the Windows Security settings.
By following these steps and enabling Windows Defender, you significantly bolster your computer’s security, safeguarding it against viruses and potential data breaches. Regularly updating your antivirus definitions and performing scans will further enhance your protection against evolving threats.
Window Defender on Window 11
Windows Defender is typically enabled by default as the built-in antivirus and security solution. It should activate automatically upon installation or when no other third-party antivirus software is detected on the system.
To ensure that Windows Defender is enabled on your Windows 11 system, you can follow these general steps once Windows 11 becomes available:
-
Click on the Start button or press the Windows key to open the Start menu.
-
Search for “Windows Security” or “Defender Security Center” and open the corresponding app.
-
In the Windows Security or Defender Security Center window, you should see an indication that Windows Defender is active and protecting your system.
-
If Windows Defender is not enabled, you can typically activate it by going to the “Virus & threat protection” or similar section within the app and following the prompts to enable real-time protection.
Please note that these steps are based on previous versions of Windows, and the process may vary in Windows 11. It is always recommended to refer to the official documentation or support resources provided by Microsoft for accurate and up-to-date instructions on how to activate Windows Defender on Windows 11 once it becomes available.
Adding Password to Account
In my experience, it’s essential to always protect your computer with strong passwords. If, unfortunately, your computer gets lost or stolen, having a password in place adds an extra layer of security. In such cases, the thief would need to reset your computer, which would result in the erasure of all your personal files. This added protection acts as a safeguard, ensuring that even if your device falls into the wrong hands, your sensitive information remains inaccessible. Remember to choose passwords that are unique, complex, and not easily guessable to maximize the effectiveness of this security measure.
To add a password or PIN to your account in Windows 10, you can follow these steps:
-
Click on the “Start” button on your desktop and select the gear icon for “Settings.”
-
In the Settings window, click on “Accounts.”
-
From the left-hand menu, choose “Sign-in options.”
-
Under the “Sign-in options” section, you will see different methods for signing into your account.
-
To set a password, click on “Password” and then click on the “Add” button.
-
Follow the on-screen prompts to create a strong password. Make sure to choose a password that is unique and not easily guessable.
-
To set a PIN, click on “PIN” and then click on the “Add” button.
-
Follow the on-screen prompts to create a PIN. A PIN is usually a shorter and easier-to-remember option compared to a password.
-
Once you have set a password or PIN, you will be required to enter it when logging into your Windows 10 account.
By following these steps, you can add a password or PIN to your Windows 10 account, adding an additional layer of security to protect your computer and personal information.
Encrypt Disk
Disk encryption is a powerful security measure that helps protect your sensitive data from unauthorized access. By encrypting a disk, you scramble its contents, making them unreadable without the appropriate decryption key or password. This ensures that even if your disk falls into the wrong hands, the data stored on it remains secure and inaccessible. Windows 10 provides a convenient built-in tool called BitLocker, allowing you to encrypt your disks effortlessly. Whether it’s an external hard drive, USB flash drive, or even your computer’s internal drive, encrypting the disk with BitLocker adds an additional layer of protection, giving you peace of mind that your confidential information remains confidential.
Encrypt Disk on Window 10
To encrypt a disk in Windows 10, you can use the built-in feature called BitLocker. Here’s how you can encrypt a disk using BitLocker:
-
Connect the disk you want to encrypt to your computer.
-
Open File Explorer by clicking on the folder icon in the taskbar or by pressing the Windows key + E.
-
Right-click on the disk you want to encrypt and select “Turn on BitLocker.”
-
If BitLocker prompts you for permission, click “Yes” to continue.
-
In the BitLocker setup wizard, select “Use a password to unlock the drive.”
-
Enter a strong password that meets the complexity requirements. Make sure to remember or securely store this password, as it is required to unlock the encrypted disk.
-
Choose a method to back up your recovery key. You can either save it to a file, print it, or save it to your Microsoft account. This recovery key is essential if you forget your password or need to access the encrypted disk from another computer.
-
Select the encryption method. The recommended option is “Encrypt entire drive,” which encrypts all the existing and future files on the disk.
-
Click “Start encrypting” to begin the encryption process.
-
The encryption process may take some time, depending on the size of the disk. You can continue to use your computer during the encryption, but it may affect performance.
Once the encryption process is complete, your disk will be protected by BitLocker. Each time you connect the encrypted disk to your computer, you will need to enter the password you set earlier to unlock and access the data on the disk.
Backup your system
Backing up your system is a crucial step to ensure the safety of your data and protect against potential data loss. Regularly creating backups of your files and system settings can be a lifesaver in case of hardware failure, software issues, malware attacks, or accidental deletions. Here are some key steps to follow when backing up your system:
-
Identify the data and files you want to back up: Determine which files, folders, and important data you need to include in your backup. This can include documents, photos, videos, music, and any other valuable files.
-
Choose a backup method: Decide on the backup method that suits your needs. Options include external hard drives, network-attached storage (NAS), cloud storage services, or dedicated backup software. Each method has its advantages and considerations, so choose the one that aligns with your preferences and requirements.
-
Set up a regular backup schedule: Establish a routine for performing backups on a regular basis. Whether it’s daily, weekly, or monthly, consistency is key to ensuring that your data stays protected and up to date.
-
Select a backup software or service: If you opt for backup software or a cloud backup service, research and choose a reputable and reliable solution that meets your requirements. Popular options include Windows File History, Windows Backup and Restore, third-party backup software like Acronis True Image, or cloud storage services like Google Drive or Microsoft OneDrive.
-
Configure backup settings: Once you’ve chosen a backup method or software, configure the settings accordingly. This includes selecting the specific files and folders to include in the backup, setting up encryption if desired, and specifying the backup destination.
-
Perform the initial backup: Start the initial backup process, which may take some time depending on the size of your data. This first backup ensures that all your important files are securely saved.
-
Test your backups: Regularly verify the integrity of your backups by restoring some files or data from the backup. This will help ensure that your backups are functioning correctly and that you can successfully retrieve your data if needed.
By following these steps and maintaining a regular backup routine, you can safeguard your system and data against unforeseen events and have peace of mind knowing that your valuable files are protected.
Debload Window
Debloating Windows refers to the process of removing unnecessary or unwanted software and features from the operating system, which can help improve system performance, free up storage space, and enhance overall efficiency. Here are some general steps to debloat Windows:
-
Uninstall unnecessary software: Open the “Settings” app, go to “Apps,” and review the list of installed applications. Uninstall any programs that you no longer need or use. Be cautious when removing built-in Windows apps, as some may be required for system functionality.
-
Disable startup programs: Open the “Task Manager” by right-clicking on the taskbar and selecting “Task Manager.” Navigate to the “Startup” tab and disable any programs that you don’t need to launch automatically with Windows. This can help improve startup speed and reduce system resource usage.
-
Remove unnecessary startup services: Press the Windows key + R, type “msconfig,” and hit Enter. In the “System Configuration” window, go to the “Services” tab and check the box for “Hide all Microsoft services.” Then, disable any non-essential services that you don’t need. Exercise caution and research before disabling any services to avoid affecting system stability.
-
Clean up temporary files: Press the Windows key + R, type “%temp%,” and hit Enter. This opens the temporary files folder. Select all files and folders and delete them. Similarly, you can run the Disk Cleanup tool by typing “Disk Cleanup” in the Windows search bar and selecting the appropriate result. This tool can help remove unnecessary files, including system files, temporary files, and other junk.
-
Review and disable unnecessary Windows features: Open the “Control Panel” and navigate to “Programs” > “Programs and Features.” On the left-hand side, click on “Turn Windows features on or off.” Here, you can review the list of Windows features and disable any that you don’t use or need. Be cautious with this step, as disabling certain features may affect specific functionalities.
-
Disable or customize visual effects: Press the Windows key + R, type “sysdm.cpl,” and hit Enter. In the “System Properties” window, go to the “Advanced” tab and click on “Settings” under “Performance.” Here, you can choose to adjust visual effects to optimize performance. You can either select the “Adjust for best performance” option or customize individual visual effects according to your preferences.
It’s important to note that debloating Windows carries some risks, and it’s recommended to create a system restore point or backup your important files before making any significant changes. Additionally, be cautious when modifying system settings or uninstalling programs, and research each step to understand its implications and ensure you don’t disable critical components.
Open source Project
Debloating Windows for improved performance and efficiency is a common practice among users. If you’re looking for a comprehensive guide and an excellent open-source project to debloat Windows 10, you can visit https://christitus.com/debloat-windows-10-2020/. This resource provides step-by-step instructions and valuable insights on debloating techniques.
Moreover, I’d like to highlight an outstanding open-source project called “WinScript” developed by Chris Titus. WinScript is designed to streamline the process of debloating Windows, enhancing its speed and overall performance. You can explore WinScript and leverage its features to efficiently remove unnecessary software, disable services, optimize privacy settings, and more.
By combining the guide mentioned earlier with the powerful capabilities of the WinScript project, you can take control of your Windows system and tailor it to your specific preferences, resulting in a faster and better computing experience.
Conclusion
Securing your operating system and protecting your digital world has become more important than ever in the face of evolving threats and advancements in technology. In this blog, we have discussed several essential steps to safeguard your Windows 10 or Windows 11 computer.
Installing the latest security patches and updates is crucial to address known vulnerabilities and ensure the integrity of your system. Enabling the firewall acts as a vigilant guardian, filtering network traffic and preventing unauthorized access to your computer. Activating Windows Defender or security features provides real-time protection against viruses and malware.
Adding a strong password or PIN to your account enhances your defense against unauthorized access, especially in case of device loss or theft. Encrypting your disks using tools like BitLocker adds an additional layer of protection, making your data inaccessible to unauthorized individuals.
Lastly, regularly backing up your system is a vital practice to protect your data from loss or damage. Whether it’s hardware failure, malware attacks, or accidental deletions, having backups ensures that you can restore your files and settings.
By implementing these security measures and following best practices, you can significantly improve the security of your Windows computer. However, it’s important to remember that security is an ongoing process. Staying vigilant, keeping your software up to date, practicing safe browsing habits, and being mindful of the information you share online are all critical in maintaining a secure digital environment.
Remember, your digital security is in your hands. Take proactive steps to protect your operating system, safeguard your personal information, and enjoy a safer online experience.
With that, we will see you next time.❤️❤️
Credit
This article was written by Abdul Rafay and published on Future Insight.
Contact Us
If you encounter any issues or have any questions regarding any of the articles on this website, please do not hesitate to contact the website’s support team. Your feedback is important and the team is dedicated to providing prompt and effective assistance to ensure a positive user experience.
To access the contact page, simply click on the “Contact” tab in the navigation menu or visit the following URL: contact page. From there, you can fill out a contact form or find additional information on how to get in touch with the support team.
Don’t let any questions or concerns go unanswered - reach out to the support team for help and guidance. They are committed to providing excellent customer service and will do everything possible to ensure that you have a seamless experience on the website.
Supporting Materials
Here are all of the links and references that I used to write this blog, so feel free to visit them to get some more help.