I’m a developer, and I have been developing applications for a while, but with time, I have seen that my skills are increasing, but every time I learn something new, I forget the old thing.
I do make notes, but writing with my hands is not a great solution, so I decided to blog, but the question is, where? So I decided to try a different blogging website and a couple of note-taking applications.
Such as Medium or Notion, but these are great, but I didn’t get the feel of writing blogs, and to be honest, the writing experience was just okay on Medium and Notion.
I love Markdown; it’s flexible and works like a champ. I have been using markdown for something like three months, and I wanted some place where I could post my blogs in markdown.
Hey! What I’m thinking is that I am a developer; I can build a blogging website. It will be easy, and I can do whatever I want with it.
Exiting Solutions
So I went online and started looking for existing solutions, and boy, did I find a lot of them, but they are either very time-consuming or lack the feature that I was looking for.
When I was researching for blog website, I have to make a couple of key choices that was, which technologies I will be using to develop and code my application,
So before that, I need to decide whether I need a dynamic website or a static website since I want to post just blogs on my website, so I will go with a static website. There are a few good reasons to go with a static website, such as speed and ease of configuration and coding. Because I don’t have time to build a dynamic website, I’m going with a static website, but you can choose your own framework, such as React, Angular, or any other framework.
Not just a any static website, I need a way to post blogs without creating an admin dashboard and this was super important, I am trying to avoid an entire full system.
So after searching like alot I came across something called HUGO.
What is HUGO:
Hugo is a fast and modern static site generator written in Go, and designed to make website creation fun again.
Hugo is a general-purpose website framework. Technically speaking, Hugo is a static site generator. Unlike systems that dynamically build a page with each visitor request, Hugo builds pages when you create or update your content. Since websites are viewed far more often than they are edited, Hugo is designed to provide an optimal viewing experience for your website’s end users and an ideal writing experience for website authors.
Hugo is a website generator that will render and build your Markdown files into different webpages. Using different Hugo commands, you can build your own post and then deploy it at the same time. It’s great and checks all of the boxes for me.
Desired characteristics:
So before we look at what I choose, here are the features that I am looking for in a blogging website.
- Post blogs using Markdown.
- Easy to Post Blogs
- There is no login.
- No security
- No ads
- Good Color Scheme
- Has the ability to switch between light and dark modes.
- Blogs by Category
- Tags for Blogs
- Each blog’s date and time
- Support for code and images
- The existing code is simple to read and modify
So these are some of the features that I am looking for.
HUGO website:
So in order to build your own Drupal-based website, you need to learn a couple of things, which are stated below:
- HUGO commands
- Create your own website command
- The command to make a new post
- Use this command to build your static website.
- Selection of a theme
- There are a lot of themes available on the Hugo website. So pick any of the themes that you like.
- To find your theme, click here.
Create Hugo Website:
Once your have selected your theme now it’s time to create your website. To do that you need to enter the following the command into your terminal.
Creating your static website: The command bellow will create basic layout for your website.
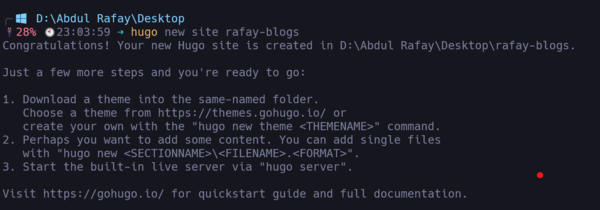
hugo new site <site name>
Example:
hugo new site rafay-blogs
 Hugo websites are handled using a config file that is generated when you create them. Every single instruction will be written in the config file. The config file can have different extensions, such as toml or yaml. The default extension for this configuration file is.toml.
Now Enter into the folder, Once your are in the folder, Open the folder using your terminal and open the folder in any of the code editior of your choice for me I am using visual studio code
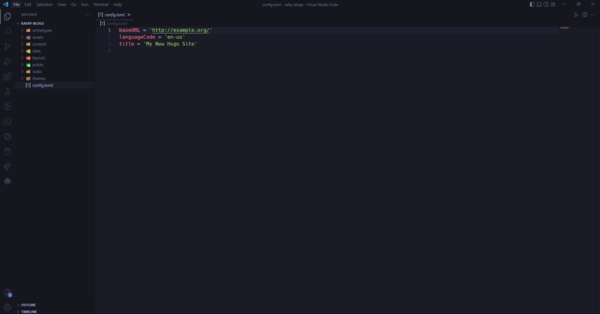
In Hugo everything is done in the config file and by default you config file will contain this sample code.
baseURL = 'http://example.org/'

languageCode = 'en-us'

title = 'My New Hugo Site'
- The baseURL is important and will aid you in the development and deployment of your website.
- The languageCode is used to change the language; it is set to English by default.
- The title is your website title.
Running the Website:
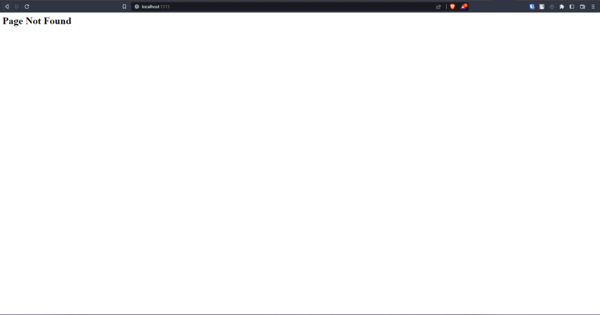
To run your website local device then enter the following command.
hugo server
The server will compile and build your website, and you can view the changes at port 1313, so the url will be
localhost:131
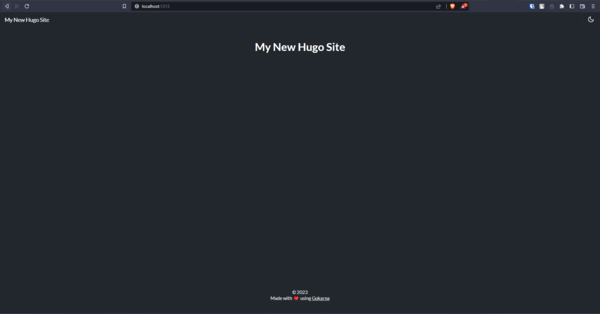
Without any theme your website will look like this:
Theme Hunt:
Now it’s time to find a theme, and you can find a good one on the Hugo website.
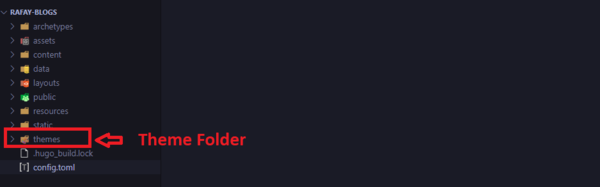
Once you have selected your theme, download it, and place all the theme files into the theme file folder in your website folder.
Theme Folder
For this purpose I will be going with gokarna theme.
Download all the files for this theme and place them in the website theme folder.

Now add theme name into the config file:
baseURL = 'http://example.org/'

languageCode = 'en-us'

title = 'My New Hugo Site'

theme = 'gokarna'
When you add a theme, it will begin to work and will look like this:
Playing with Config File:
Mainly, there are two config files.
- Website config file
- Theme config file
Depending on the theme, there might not be any theme configuration files, so please check the official documentation of that theme. There will be a lot of features in that theme.
Rafay-Blog config file:
baseURL = 'https://rafay-blog.onrender.com'
languageCode = 'en-us'
title = 'Abdul Rafay Blogs'
theme = 'gokarna'
defaultContentLanguage = "en"
enableRobotsTXT = true

  # -----------------------------------------------------------
  #                 Default Parameters
  # -----------------------------------------------------------
[params]
    avatarURL = "/images/avatar.jpg"
    description = "Don't Comments bad code- rewrite it."
    showPostsOnHomePage = "popular"
    togglePreviousAndNextButtons = "true"
    customHeadHTML = "<script>console.log('Any HTML')</script>"
     socialIcons = [
      {name = "twitter", url = "https://twitter.com/abdul_rafay99"},
      {name = "linkedin", url = "https://www.linkedin.com/in/abdul-rafay1999/"},
       {name = "stackoverflow", url = "https://stackoverflow.com/users/13860632/abdul-rafay"},
      {name = "github", url = "https://github.com/rafay99-epic"},
    ]
    pygmentsStyle = "monokai"
    metaKeywords = ["blog", "gokarna", "hugo"]
    search= true
    favicon = "/images/favicon.jpg"
    summaryLength = "10"

  # -----------------------------------------------------------
  #                 Main Menu Parmeters
  # -----------------------------------------------------------
  [[menu.main]]
    identifier = "post"
    url = "/post/"
    name = "Posts"
    weight = 1
    pre = "<span data-feather='book'></span>"

  [[menu.main]]
    identifier = "home"
    url = "/"
    name = "Home"
    weight = 1
    pre = "<span data-feather='home'></span>"

  [[menu.main]]
    identifier = "tags"
    name = "Tags"
    url = "/tags/"
    weight = 2
    pre = "<span data-feather='tag'></span>"

  [[menu.main]]
    identifier = "github"
    url = "https://github.com/rafay99-epic"
    weight = 3
    pre = "<span data-feather='github'></span>"


# --------------------------------------
#   --- Markdown Config Section ---
# --------------------------------------

[markup]
  [markup.tableOfContents]
    startLevel = 1
    endLevel = 3
    ordered = true

[markup.highlight]
      codeFences = true
      guessSyntax = true
      hl_Lines = ""
      lineNoStart = 1
      lineNos = false
      lineNumbersInTable = false
      tabWidth = 4
      noClasses = false
Theme Config File:
#----------------------------------------------------------
#     This is the theme config File                        #
#     Author and Theme setting                            #
#     Author Name: Abdul Rafay                            #
#-----------------------------------------------------------
name = "Gokarna"
description = "Gokarna is an opinionated theme with a focus on minimalism and simplicity"

license = "MIT License"
licenselink = "https://github.com/rafay99-epic/Blog-website/blob/main/LICENSE"

tags = ["blog", "minimal", "dark", "light", "responsive", "personal", "portfolio"]
features = ["Blog", "Responsive", "Minimal", "Clean", "Simple", "SEO", "Bootstrap", "Fast", "Dark", "Light"]
authors = [
  {name = "Abdul Rafay", homepage = "https://raafay99.info"},
]
min_version = "0.81.0"
So you can now experiment with different themes and the config file to see what you like and create some awesome.
Build Website:
Now you have conpleted your website now it’s time to build and deploy your website.
To build your website you need to enter the following command into the terminal:
hugo -t <theme name>
example
hugo -t gokarna
When you enter this command, it will begin building your website, placing all files in the public folder or creating one if one does not already exist.
Then you can upload your code to github and deploy your website using any of the available deployment platforms.
Hugo’s Layouts Folder
The layouts folder contains HTML files that define the structure of your site. In some cases, you may see a Hugo site without a layouts folder because it doesn’t have to be in the project’s root directory and can reside within a theme folder instead.
Similar to WordPress themes, which use PHP for templating, Hugo templates consist of base HTML with additional dynamic templating powered by Golang’s built-in html/template and text/template libraries. The various HTML template files required for generating your site’s HTML markup are in the layouts folder.
Hugo’s Folder Structure:
Hugo’s Themes Folder
For sites that prefer a more self-contained way of storing template files and assets, Hugo supports a themes folder. Hugo themes are similar to WordPress themes in that they’re stored in a themes directory and contain all the necessary templates for a theme to function.
While some Hugo users prefer keeping theme-related files in the project’s root directory, storing these files within the themes folder allows for easier management and sharing.
Massive Data Folder
Hugo’s data folder is where you can store supplemental data (in JSON, YAML, or TOML format) that is needed to generate your site’s pages. Data files are beneficial for larger data sets that may be cumbersome to store directly in a content or template file.
For example, if you wanted to create a list of USD inflation rates from 1960 to 2020, it would take around 80 lines to represent the data (one line for each year). Instead of putting this data directly in a content or template file, you can create it in the data folder and populate it with the necessary information.
Hugo Static Folder
Hugo’s static folder is where you store static assets that don’t require any additional processing. The static folder is typically where Hugo users store images, fonts, DNS verification files, and more. When a Hugo site is generated and saved to a folder for easy deployment, all files in the static folder are copied as-is.
If you’re wondering why we didn’t mention JavaScript or CSS files, it’s because they’re often dynamically processed via pipelines during site development. In Hugo, JavaScript and CSS files are commonly stored within the theme folder because they require additional processing.
Adding Content:
Now the only thing that is left is to add new posts and content to the website. To add content to the website, you must enter the following command into the terminal:
hugo new posts/<post name>.md
Example:
hugo new posts/2021/2021-08-30-a-sample-post.md
The above command will create a new post with the mardown extension. This chapter also includes some templates.
Example:
---

title: "2021 08 30 a Sample Post"

date: 2023-01-22T00:22:58+05:00

draft: true

---
You can write in Markdown and then build your website, which will render it and then deploy it to the internet.
Summary:
Hugo is one of the most popular static site generators in the world, and for good reason. Not only does it have super-fast build processing, but it also ships with powerful templating capabilities that support partials and shortcodes.
In this tutorial, you learned how to configure Hugo, create a new project, add content files, edit theme files, and deploy a finished static site. We recommend going through the official Hugo documentation to learn more about Hugo and its more advanced features like custom functions, front matter, and CSS/JS buildpacks.
I’m using hugo base website on daily bases and belive me it works like a champ. I have no compain regarding this framwork. So Try it and then let me your thoughts.
I will see you next time.❤️
Credit:
This article was written by Abdul Rafay and published on Future Insight.
Contact Us:
If you have any questions, please contact