I must say that setting up Flutter is not easy. There are a lot of videos out there that claim to help you set up the Flutter SDK for Windows, Linux, or macOS, but they are often incomplete and don’t answer the most basic questions you may have. So, I’ve decided to write this blog to help you guys out.
From day one, I’ve been a web developer, using React, HTML, CSS, and JavaScript to create websites. However, when it comes to Android applications, I’ve developed using Android Studio, which means managing two code bases: one for Android and one for the web. That’s why I’ve chosen to learn Flutter for this purpose.
As a beginner in Flutter development, I had a lot of questions in my mind, and I’m sure many of you have similar questions. So, I’ve listed all the questions I had, and I’ll be answering them in this blog.
Questions
- How to create a Flutter Project?
- How to run a Flutter project on an emulator?
- How to set up an emulator on Windows?
Create a Flutter Project
To create a project in Flutter, there are multiple ways. The two main methods are:
- Use Visual Studio Code to create a Flutter project.
- Use Android Studio to create a Flutter project.
In this blog, I’ll be using Visual Studio Code to create a Flutter project.
Create a Flutter Project using Visual Studio Code
To create a Flutter project, you’ll need to have VS Code installed on your system. If you haven’t installed VS Code yet, make sure to do so. Once you have VS Code installed, you need to install the Flutter and Dart extensions. To install these extensions, follow these steps:
- Open Visual Studio Code.
- Open the Extensions sidebar by pressing
Ctrl+Shift+Xor by clicking the Extensions icon in the sidebar. - Search for “Flutter” in the extensions search bar.
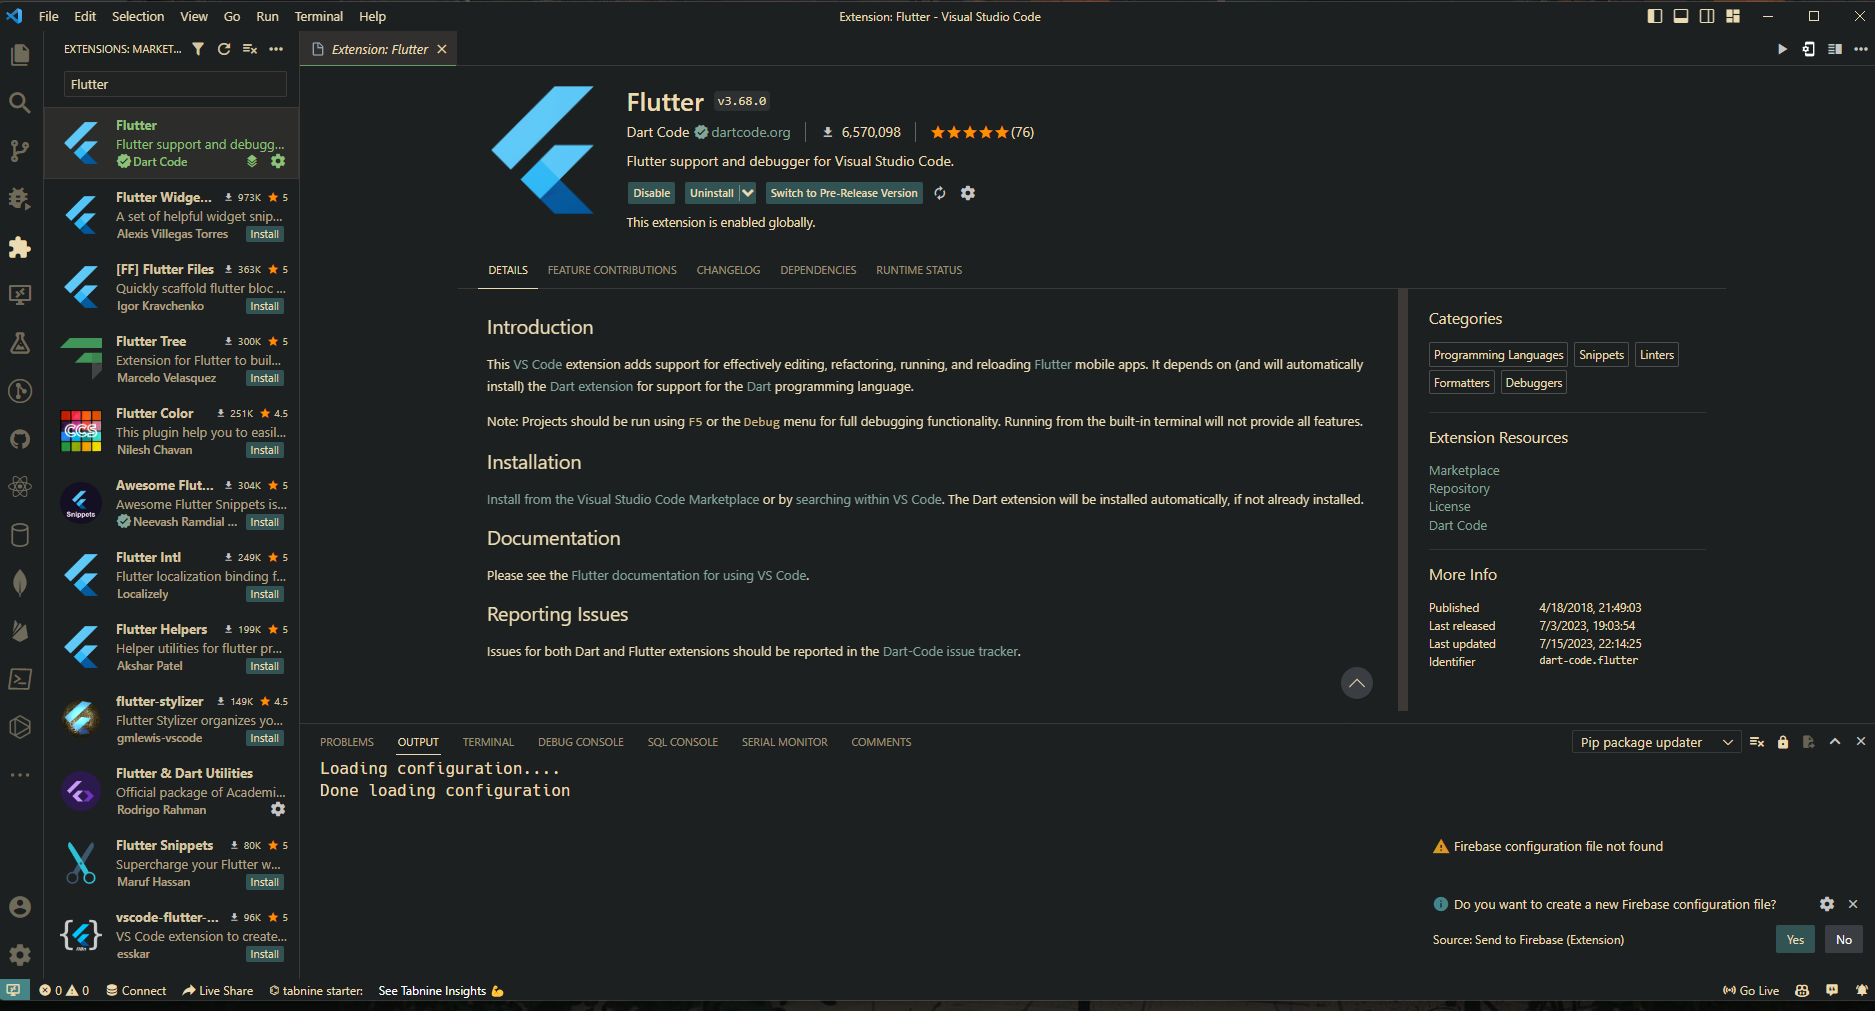
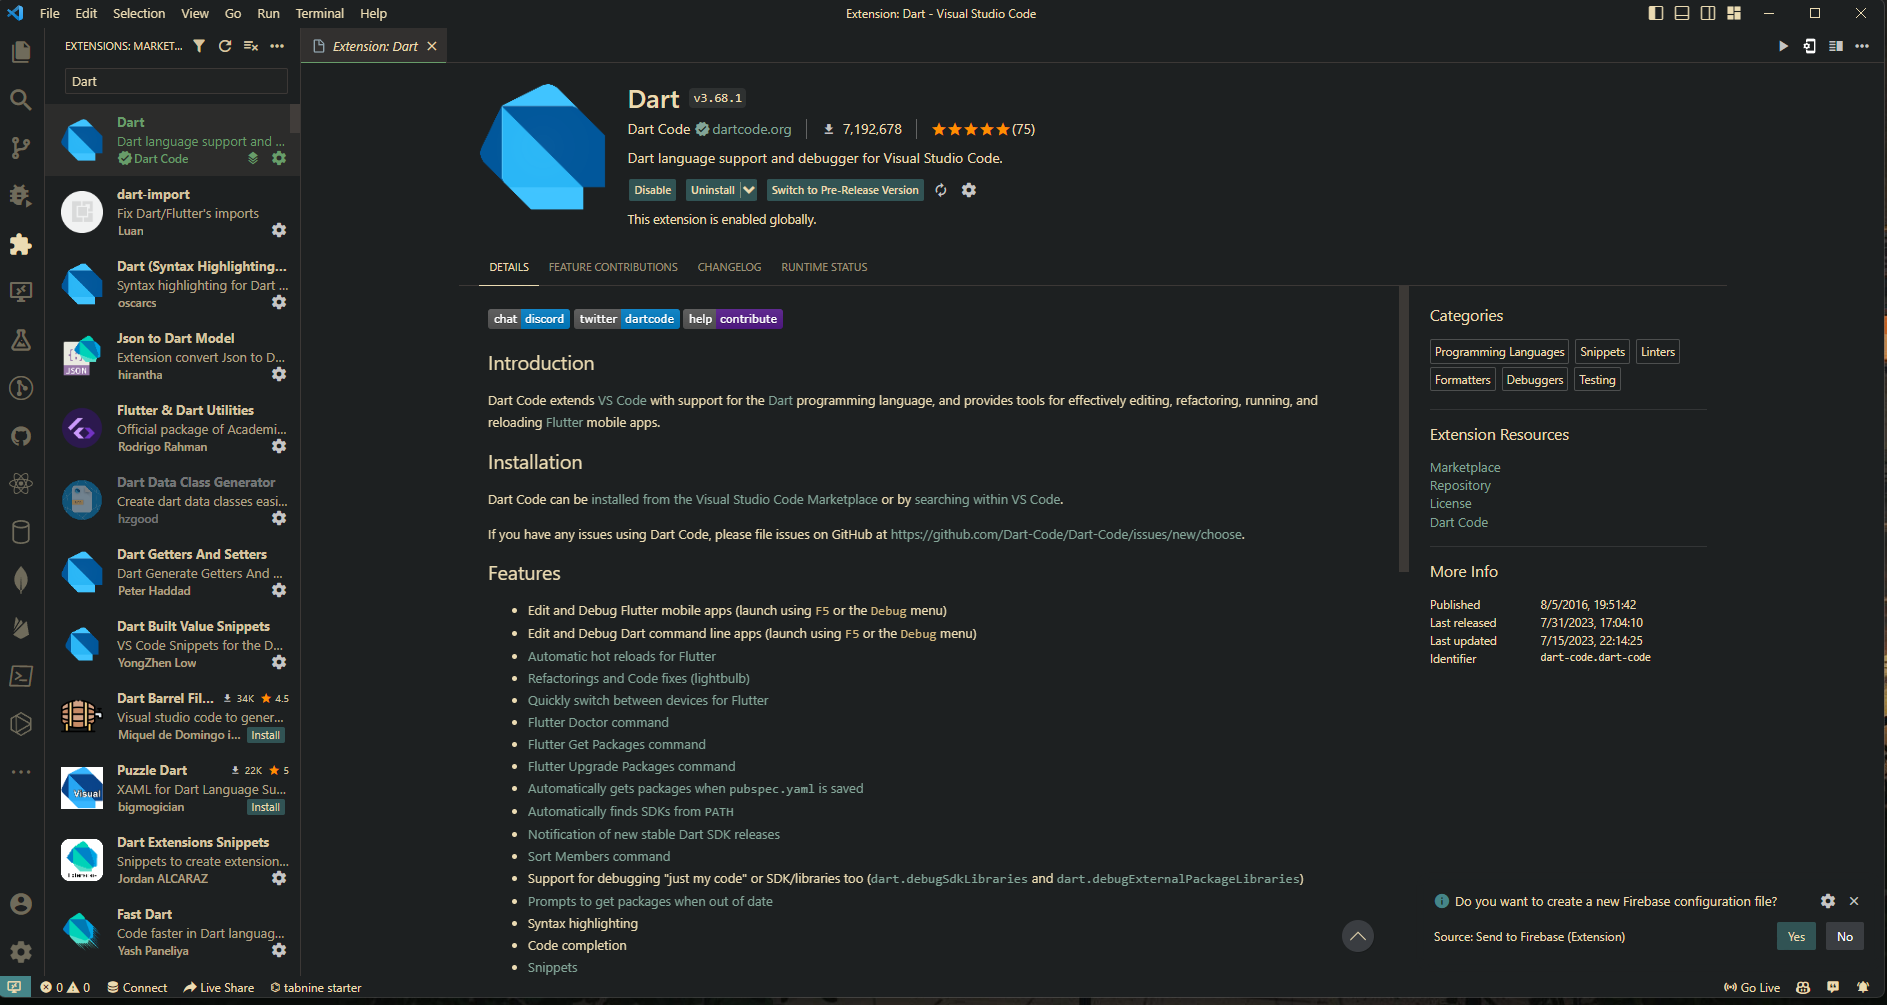
- Once the Flutter extension is installed, search for “Dart” in the extensions search bar.
Now that you have everything set up, you can create a Flutter project by following these steps:
- In VS Code, press
Ctrl+Shift+Pto open the command palette. - Type “flutter” in the command palette and select “Flutter: New Project”.

- Select the location where you want to create your project.
- Name the project and press enter.
With that, you have created your first Flutter project. You can now open the project in VS Code and start coding.
Run a Flutter Project on an Emulator
To run a Flutter project, you’ll need to have an emulator or a real device. In this blog, I’ll show you how to run a Flutter project on an emulator. To install an emulator, you’ll need to download Android Studio on your system.
Assuming you have already installed Android Studio on your system and set up an emulator, if you haven’t, you can refer to my previous blog post on how to do that.
Installing Emulator
If you want to install an emulator on your system, you’ll need an extension that can help you run your Flutter project on an emulator. To install the extension, follow these steps:
- Open Visual Studio Code.
- Open the Extensions sidebar by pressing
Ctrl+Shift+Xor by clicking the Extensions icon in the sidebar. - Search for “Emulator”.
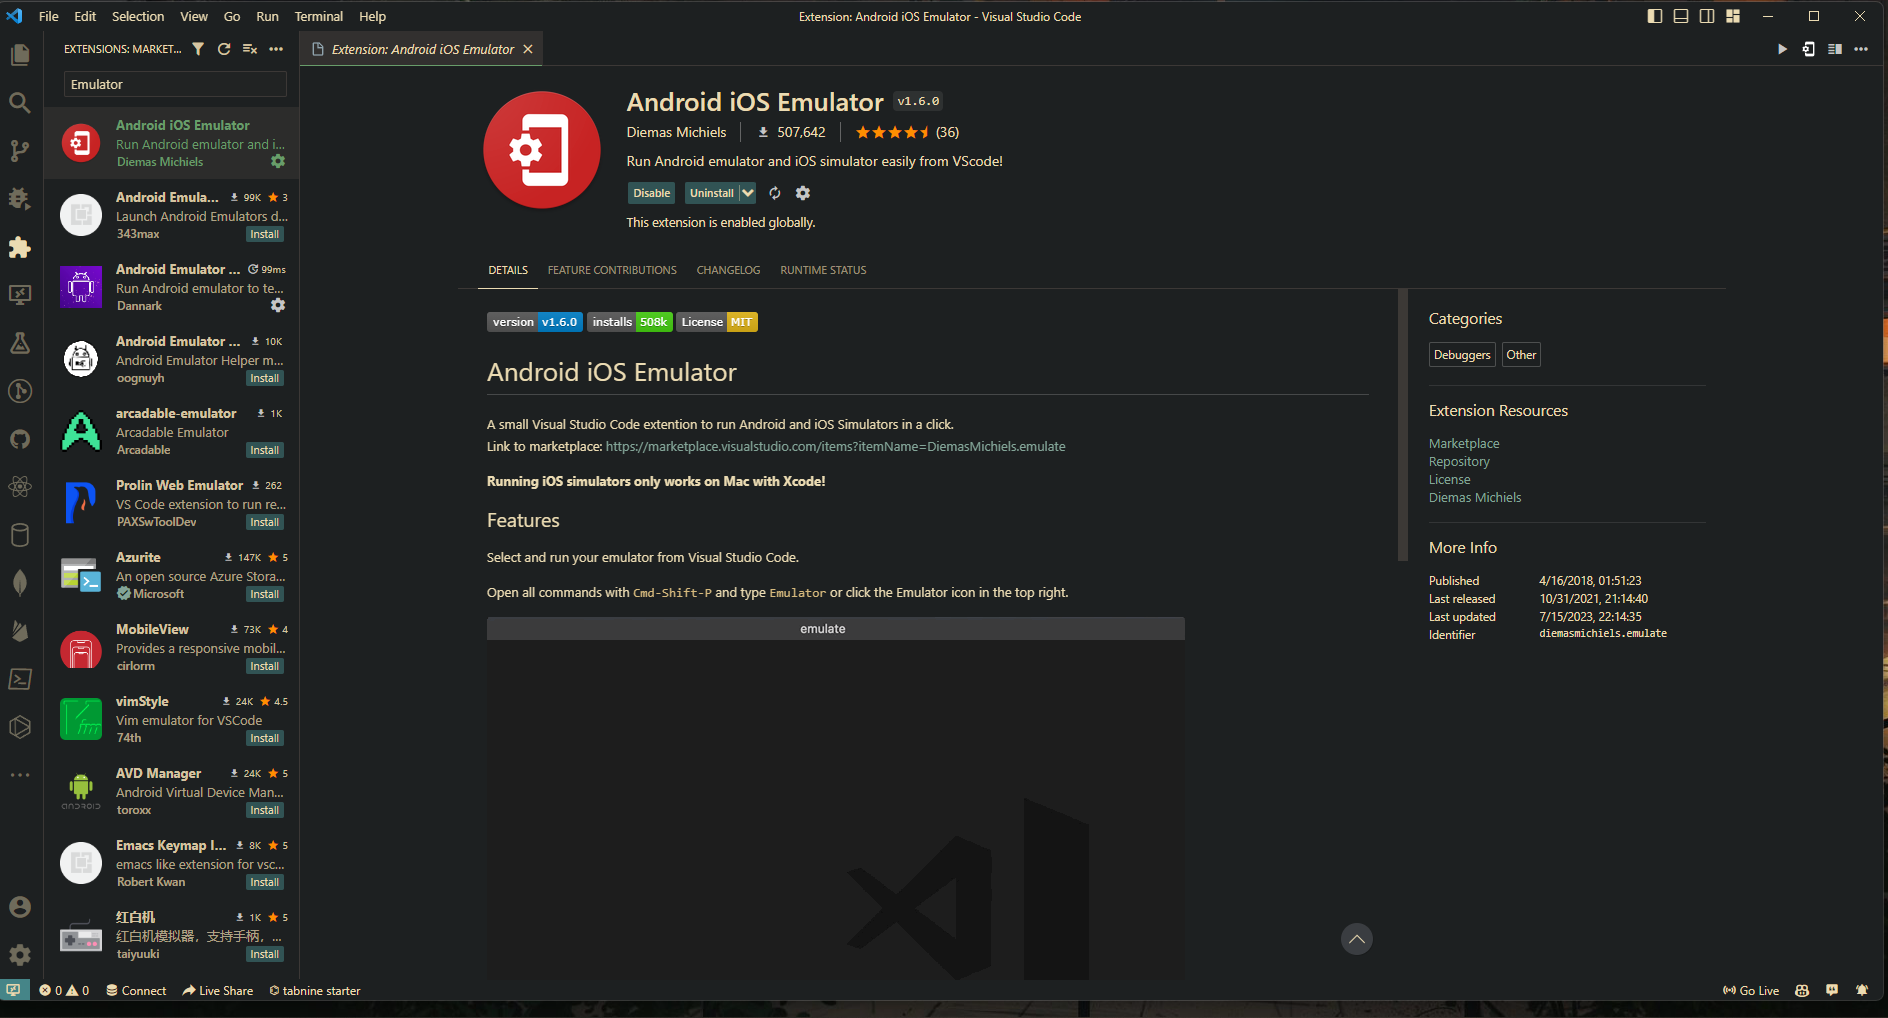
- Install the extension.
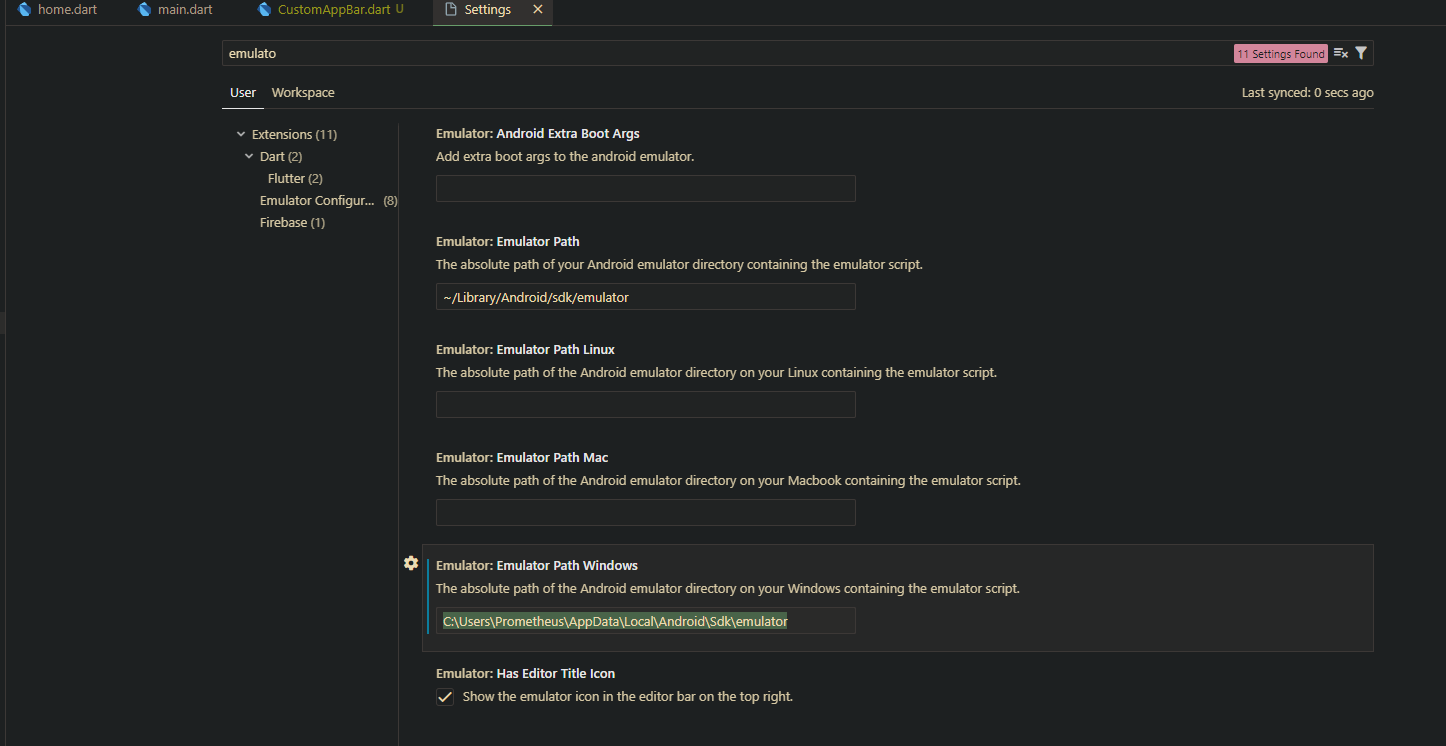
- Now you need to set your emulator path in VS Code. To do that, follow these steps:
- Open VS Code.
- Press
Ctrl+Shift+Pto open the command palette. - Type “Flutter: Select Device” and press enter.
- Select “Emulator” and press enter.
- Select your emulator and press enter.
- Now you have set your emulator path in VS Code.
- You need two paths:
~/Library/Android/sdk/tools/emulatorC:\Users\{username}\AppData\Local\Android\Sdk\emulator- You need to change the username in the path to your username.
- Place these paths in the settings in VS Code.
- Now you can run your Flutter project on the emulator.
Run a Flutter Project on an Emulator
To run a Flutter project on an emulator, follow these steps:
- Open your Terminal in VS Code.
- Run this command to launch your emulator:
flutter emulators --launch {emulator name}- Emulator name is the name of your emulator.
- Now you can run your Flutter project on the emulator.
flutter runis the command that will deploy your Flutter project on the emulator.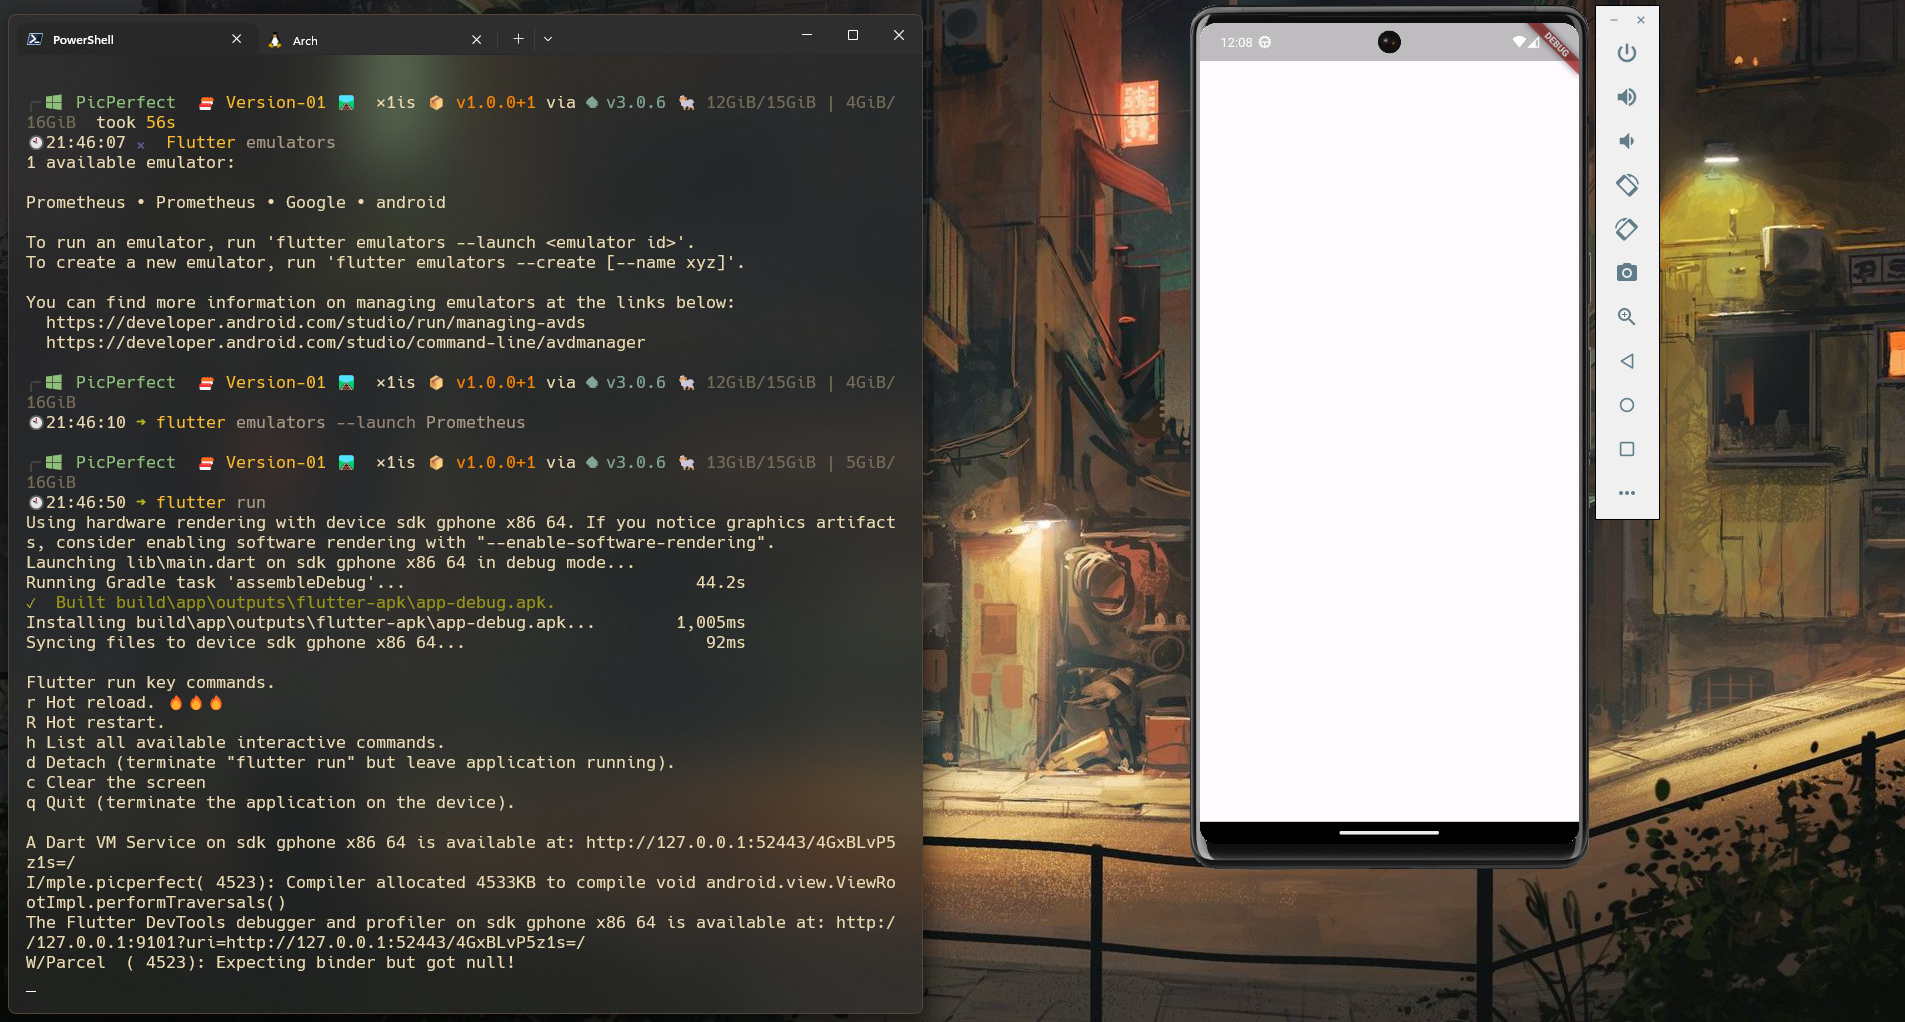
Conclusion
Congratulations! You have now configured VS Code to run your Flutter project on an emulator. I hope this blog helps you set up your Flutter project. If you have any questions or suggestions, feel free to contact me.
Happy coding! 🙂
With that, we will see you next time.❤️❤️
Credit
This article was written by Abdul Rafay and published on Future Insight.
Contact Us
If you encounter any issues or have any questions regarding any of the articles on this website, please do not hesitate to contact the website’s support team. Your feedback is important and the team is dedicated to providing prompt and effective assistance to ensure a positive user experience.
To access the contact page, simply click on the “Contact” tab in the navigation menu or visit the following URL: contact page. From there, you can fill out a contact form or find additional information on how to get in touch with the support team.
Don’t let any questions or concerns go unanswered - reach out to the support team for help and guidance. They are committed to providing excellent customer service and will do everything possible to ensure that you have a seamless experience on the website.
Thumbnail